Using PacketQC
This section guides users through the use of PacketQC, covering its key features and activities involved in managing cryptographic assets and evaluating post-quantum security readiness.
1. PacketQC features walkthrough
Here are the key features of PacketQC.
User registration and login
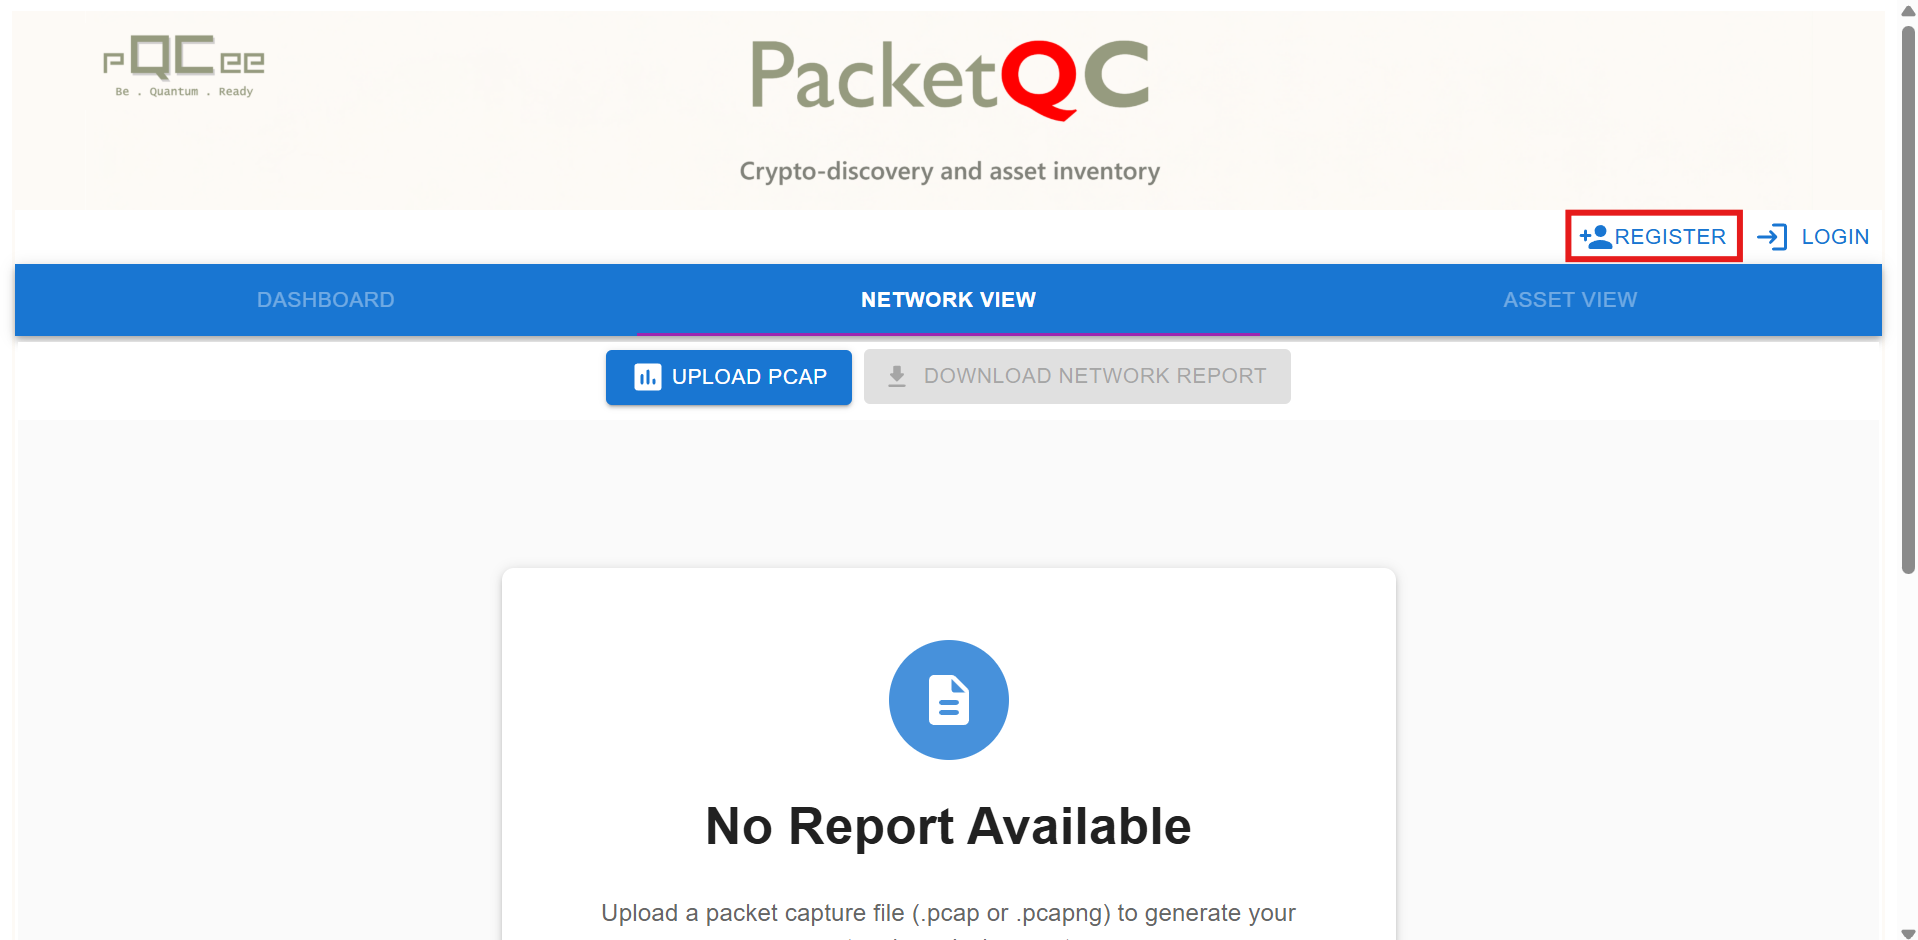
Users can begin using PacketQC by registering for a new account and logging in with their registered credentials.
Steps
Click on the
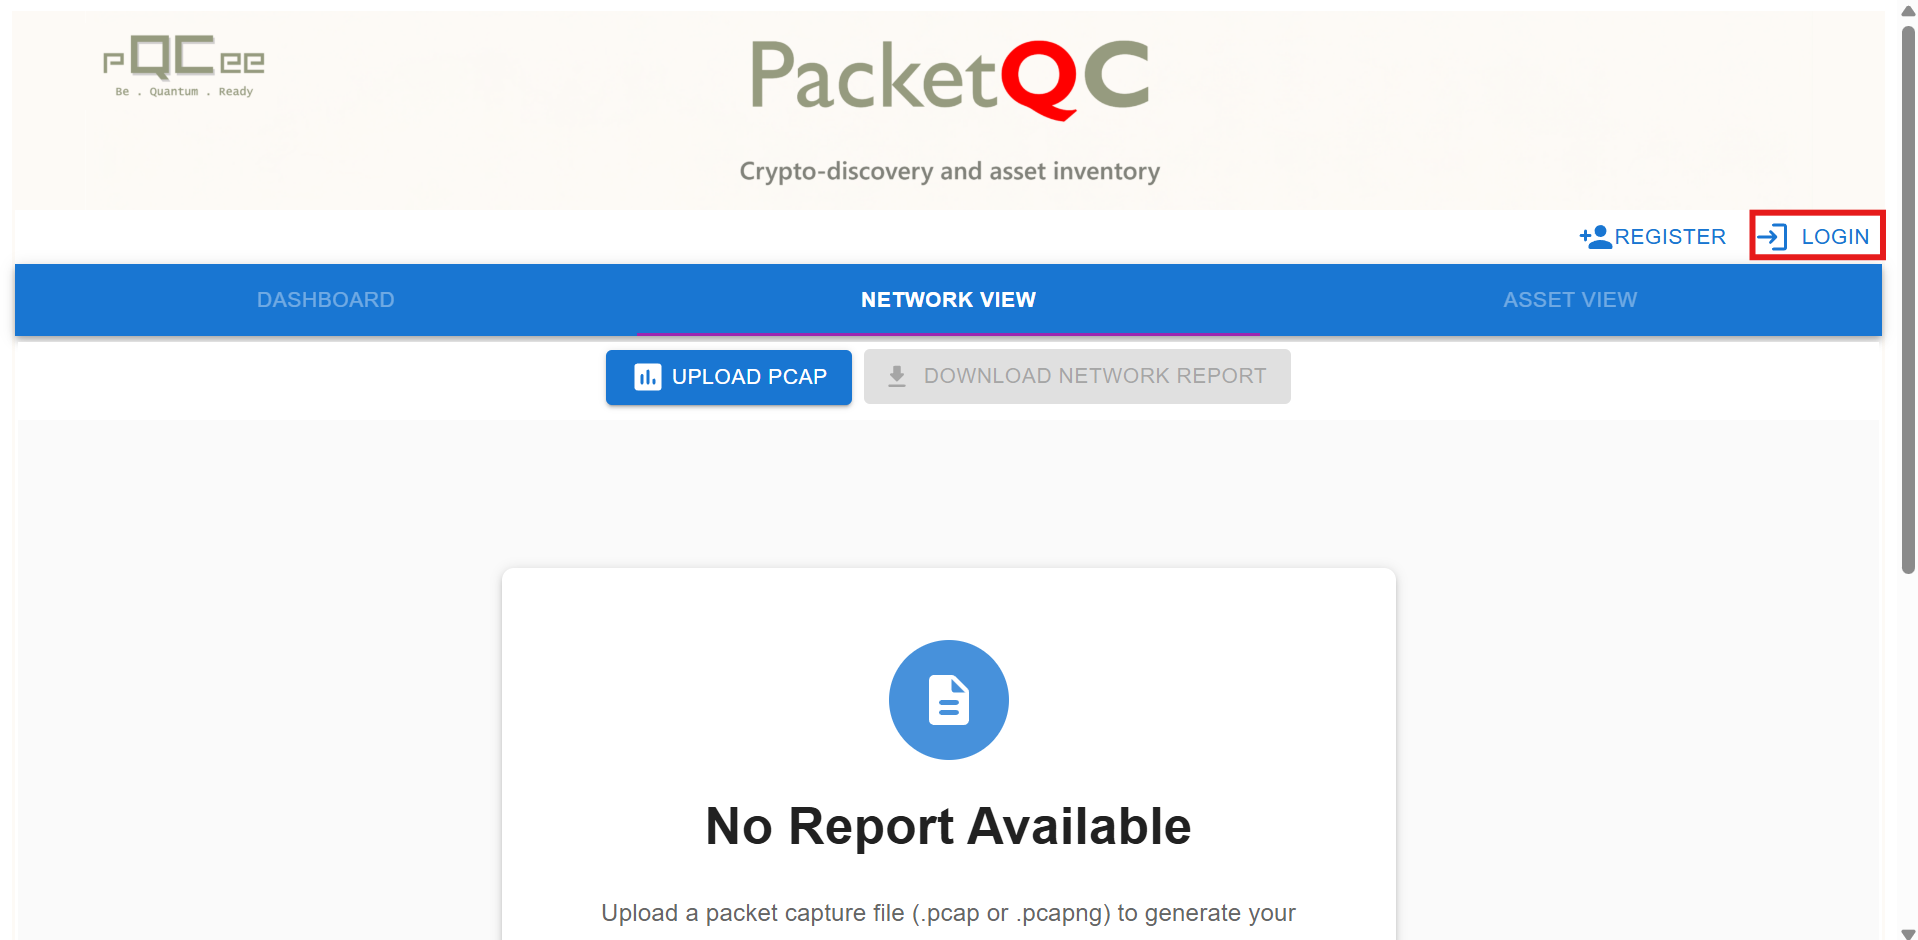
REGISTERbutton on the top right to register a new user.After a user is registered, click the
LOGINbutton to login with the registered credentials.
Note
Using PacketQC without logging in
PacketQC supports PCAP file analysis without user login; however, most key features require users to be authenticated.
Generating a network report
A network report describes the overall security posture of the network by consolidating detected connections, cryptographic assets, protocol security classifications, and related security findings. PacketQC’s key features work together to present a comprehensive view of the report, enabling users to assess risks, investigate findings, and prioritize remediation activities more effectively. Perform the following steps to generate a security report with PacketQC:
Steps
Click the
ADD PCAPbutton.Select a pcap or pcapng file in the file selection window. Please wait for report generation to complete.
For instructions on capturing packets in pcap or pcapng format, refer to the Capturing network traffic in pcap/pcapng section.
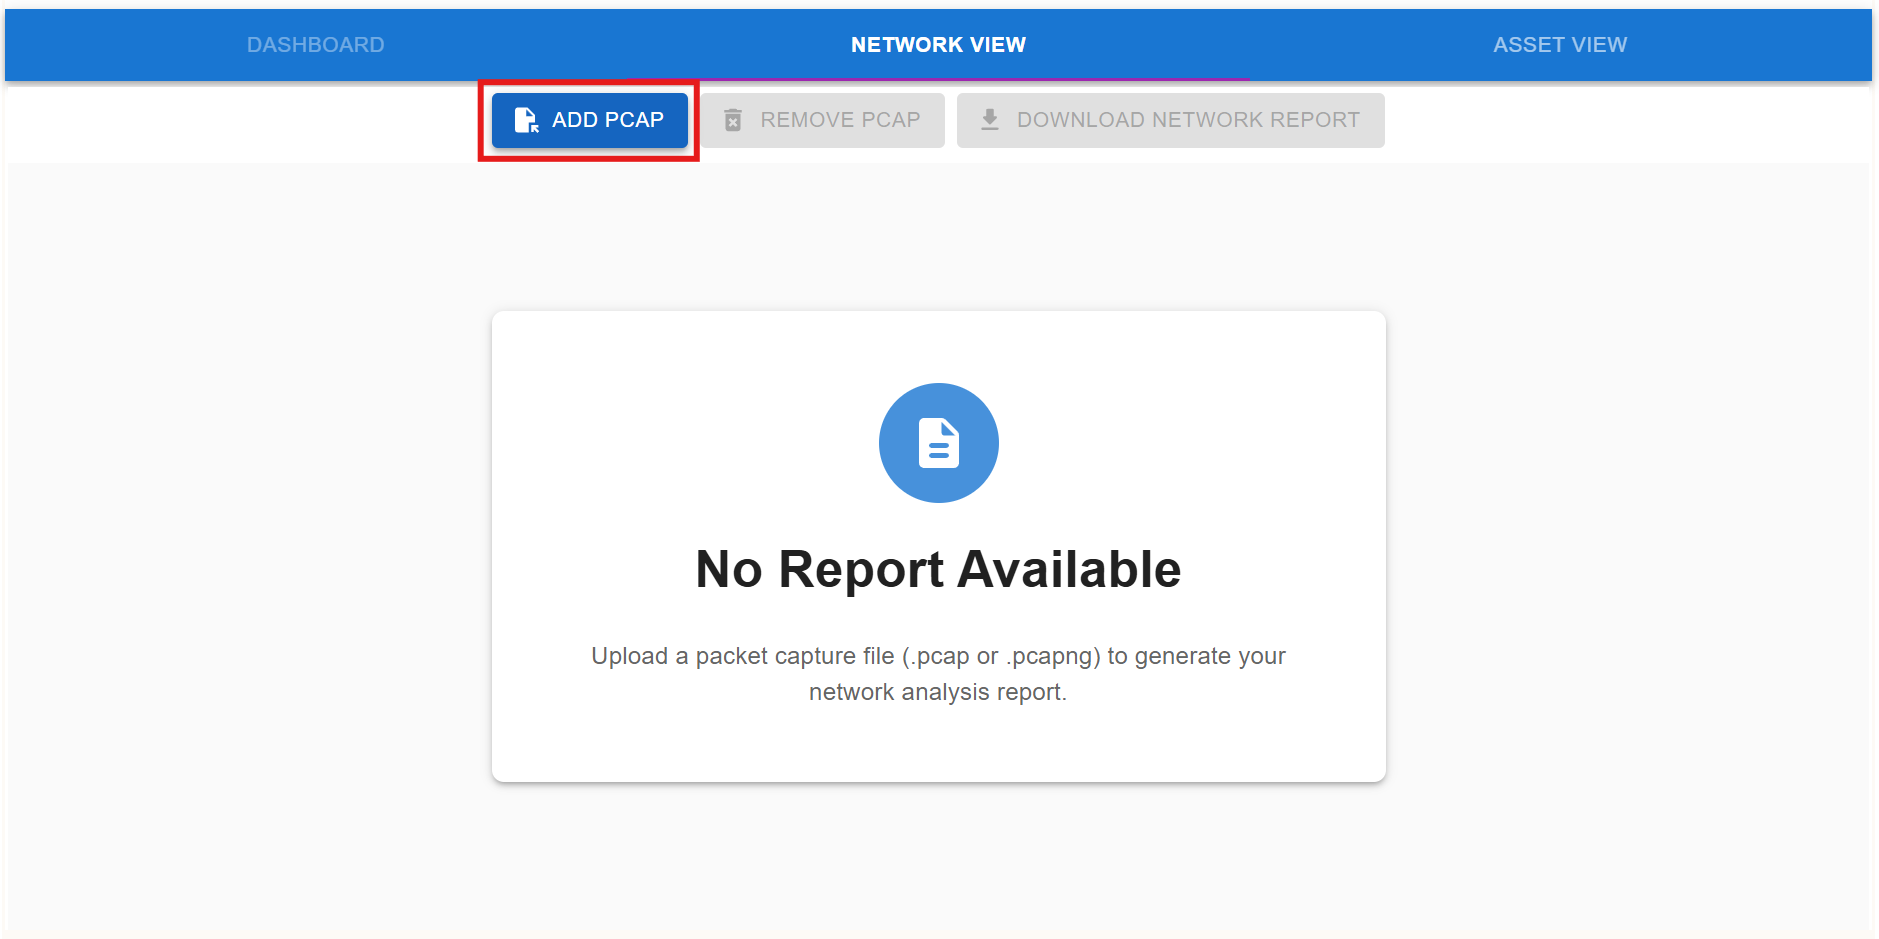
Fig. 6 Click to add pcap
Cryptographic Analysis
PacketQC detects a wide range of protocols, with cryptographic analysis provided for the following supported protocols:
IPsec
QUIC
RDP
SSH
TLS
PacketQC’s cryptographic analysis categorizes protocol security according to four defined security levels:
Abbreviation |
Colour |
Denotes |
Description |
|---|---|---|---|
QS |
Green |
Quantum Secure |
Quantum-secure connections, such as those using TLS 1.3 |
CS |
Yellow |
Classical Secure |
Connections classified as classically secure, but not quantum-secure, such as those using TLS 1.2 |
IN |
Red |
Insecure |
Connections that use insecure cryptographic mechanisms, such as MD5 |
UC |
Grey |
Unclassified |
Security level of this connection is not known, usually due to the lack of a cryptographic layer |
Dashboard
After a network report has been generated, navigate to the DASHBOARD to access the security overview.
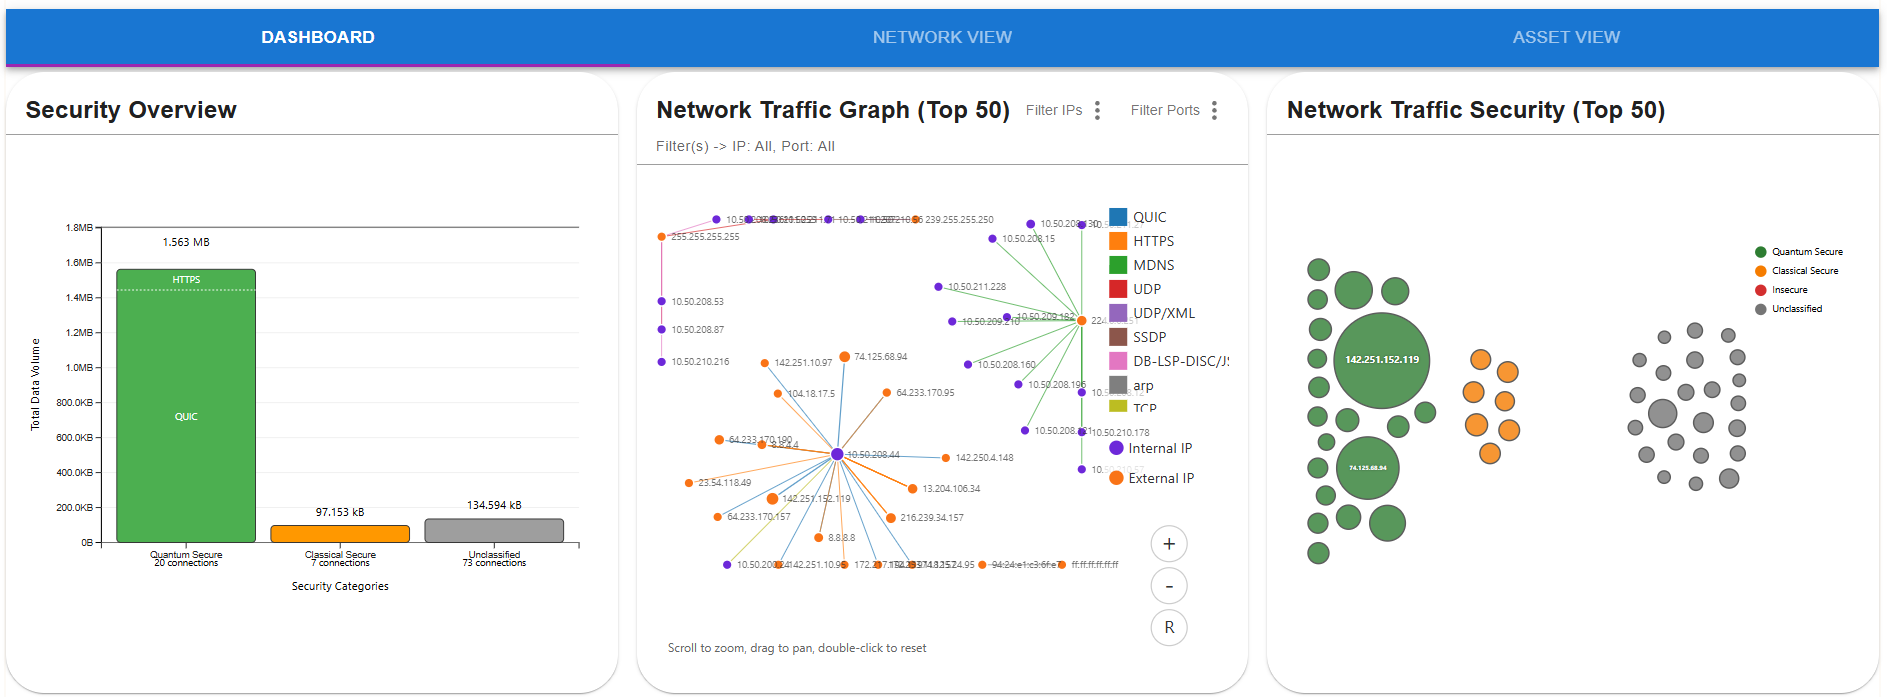
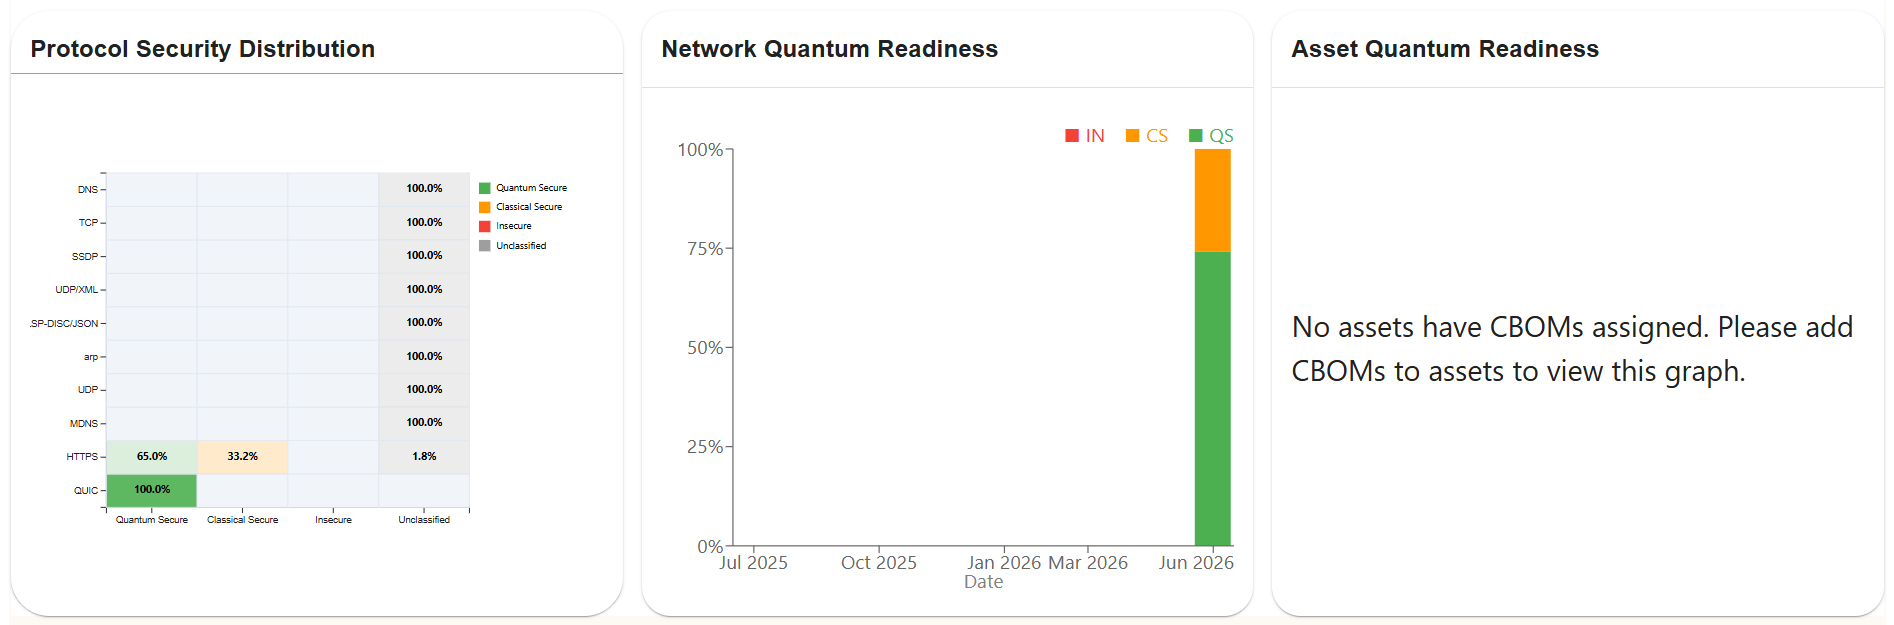
Fig. 7 Dashboard view
The dashboard presents key insights through the following graphs:
Security Overview and Network Traffic Security collectively summarizes the overall quantum security posture by comparing the number of detected quantum-secure connections, classical-secure connections, insecure connections, and those that are unclassified.
Network Traffic Graph visualizes the communications between assets, providing visibility into the network links and protocols observed across these connections.
Protocol Security Distribution summarizes the detected protocols (eg. HTTPS, TCP, UDP) and their corresponding quantum security posture.
Network Quantum Readiness tracks quantum-safe readiness over time, providing visibility into the network’s post-quantum security progress.
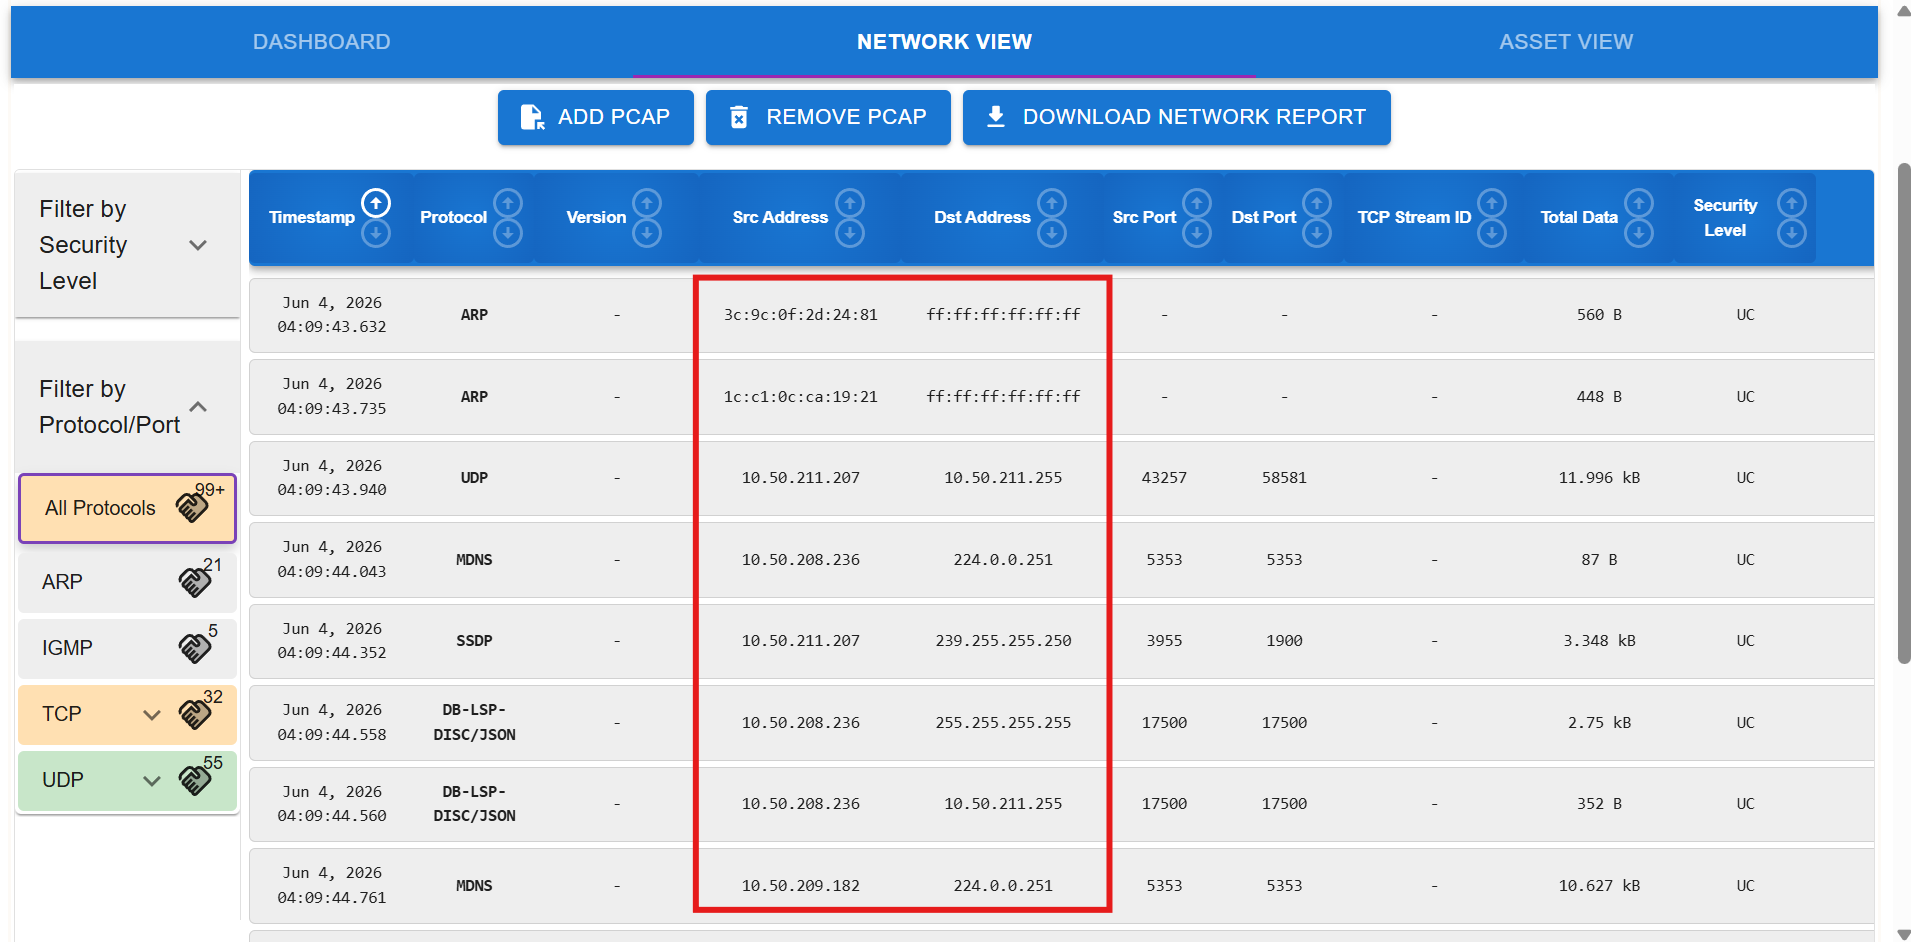
Network View
After a network report has been generated, the Network View provides a detailed list of all detected connections, including their associated connection information and security details.
The main view
This view provides a detailed overview of all detected connections, providing information such as:
Network View information
Connection timestamp
Protocol: HTTPS, TCP, UDP etc
Version: Protocol version
Source and destination addresses: IP, MAC and port numbers
Total data: Total traffic of the connection in bytes
Security level: Quantum Secure, Classical Secure, Insecure or Unclassified
Click on any of these columns to sort them in ascending/descending order.
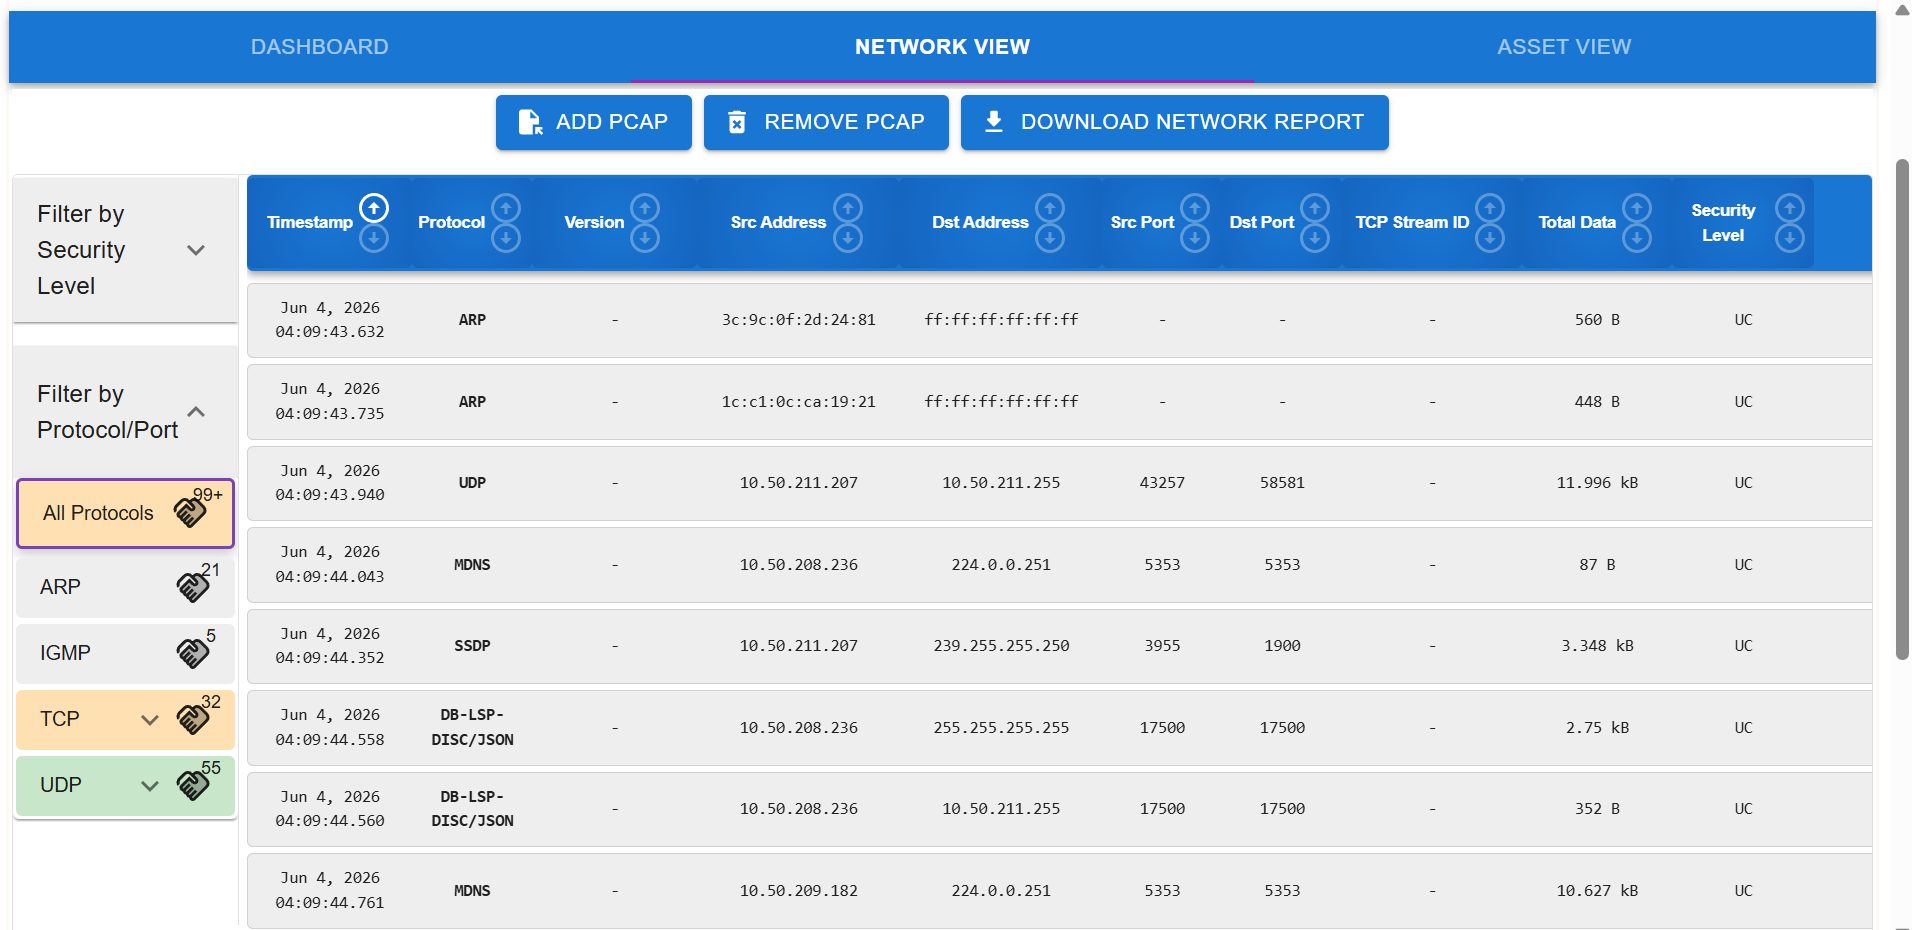
Fig. 8 Network view and connection details
Filter by Security Level and Filter by Protocol/Port
These filtering options on the left allow users to efficiently identify, review, and prioritize connections based on their quantum security posture.
Steps
Click on either
Filter by Security LevelorFilter by Protocol/Porton the left to display a list of available filters.Select a filter, such as
Classical Secure, to display only the relevant connections for easier investigation.
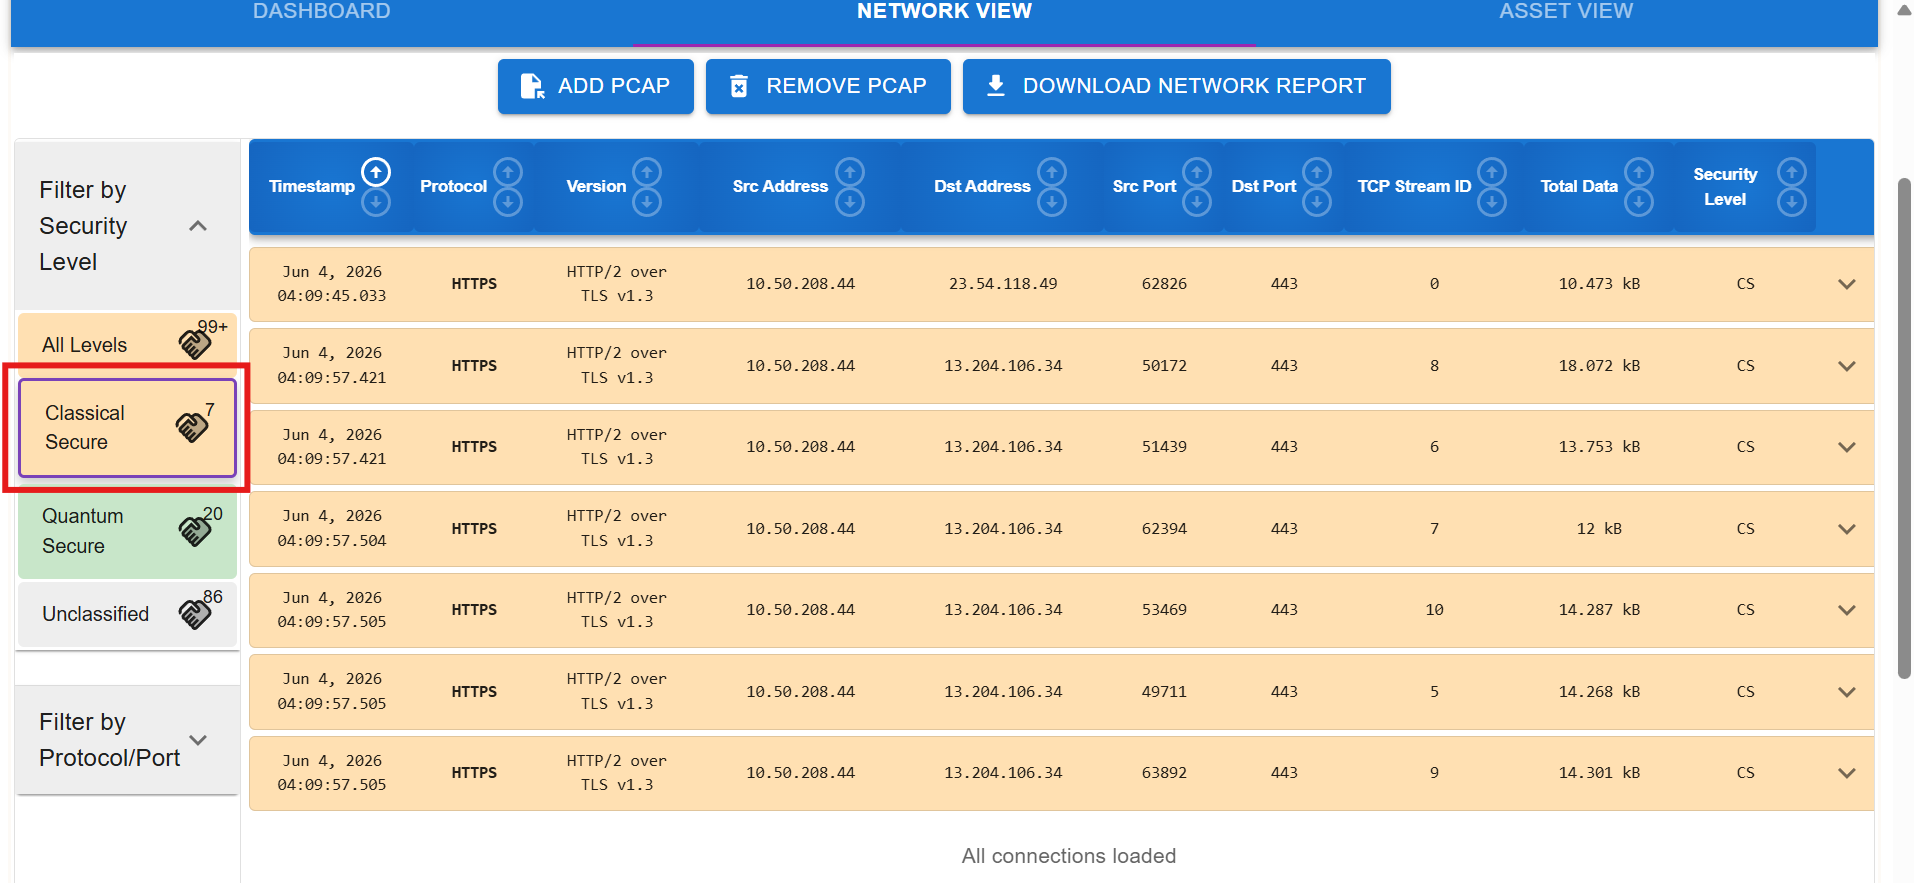
Fig. 9 Filter the Network View to display classically secure connections.
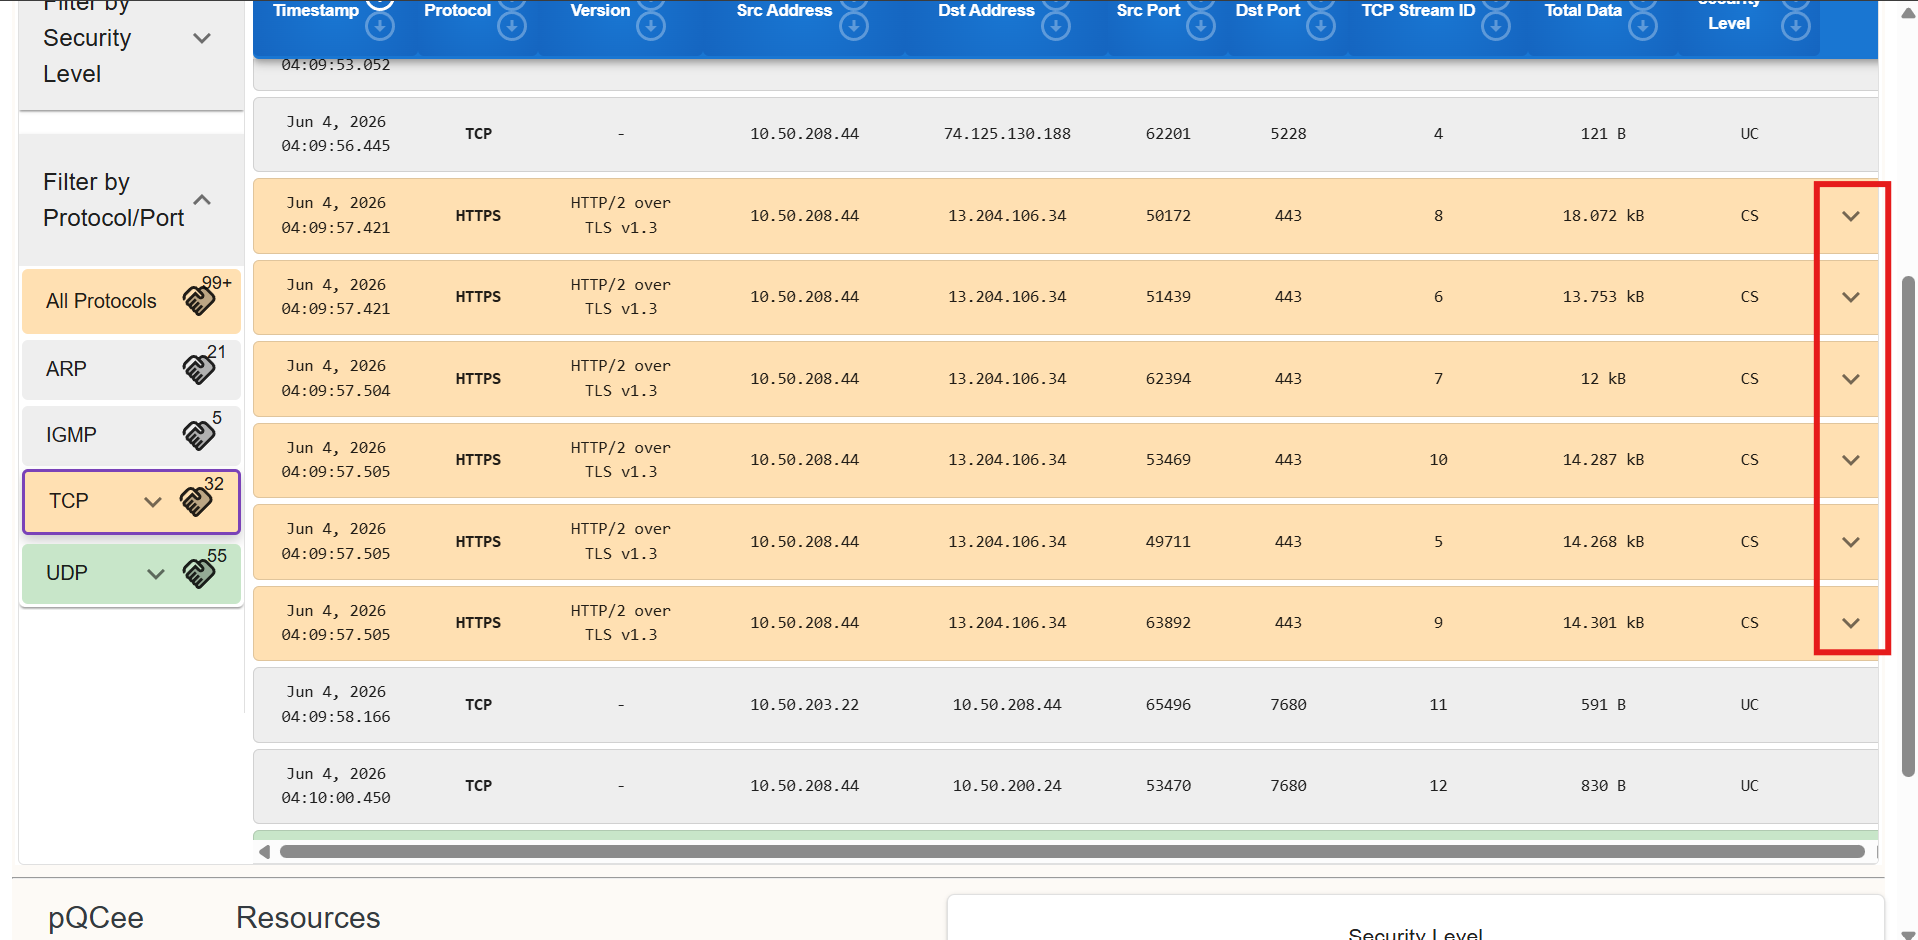
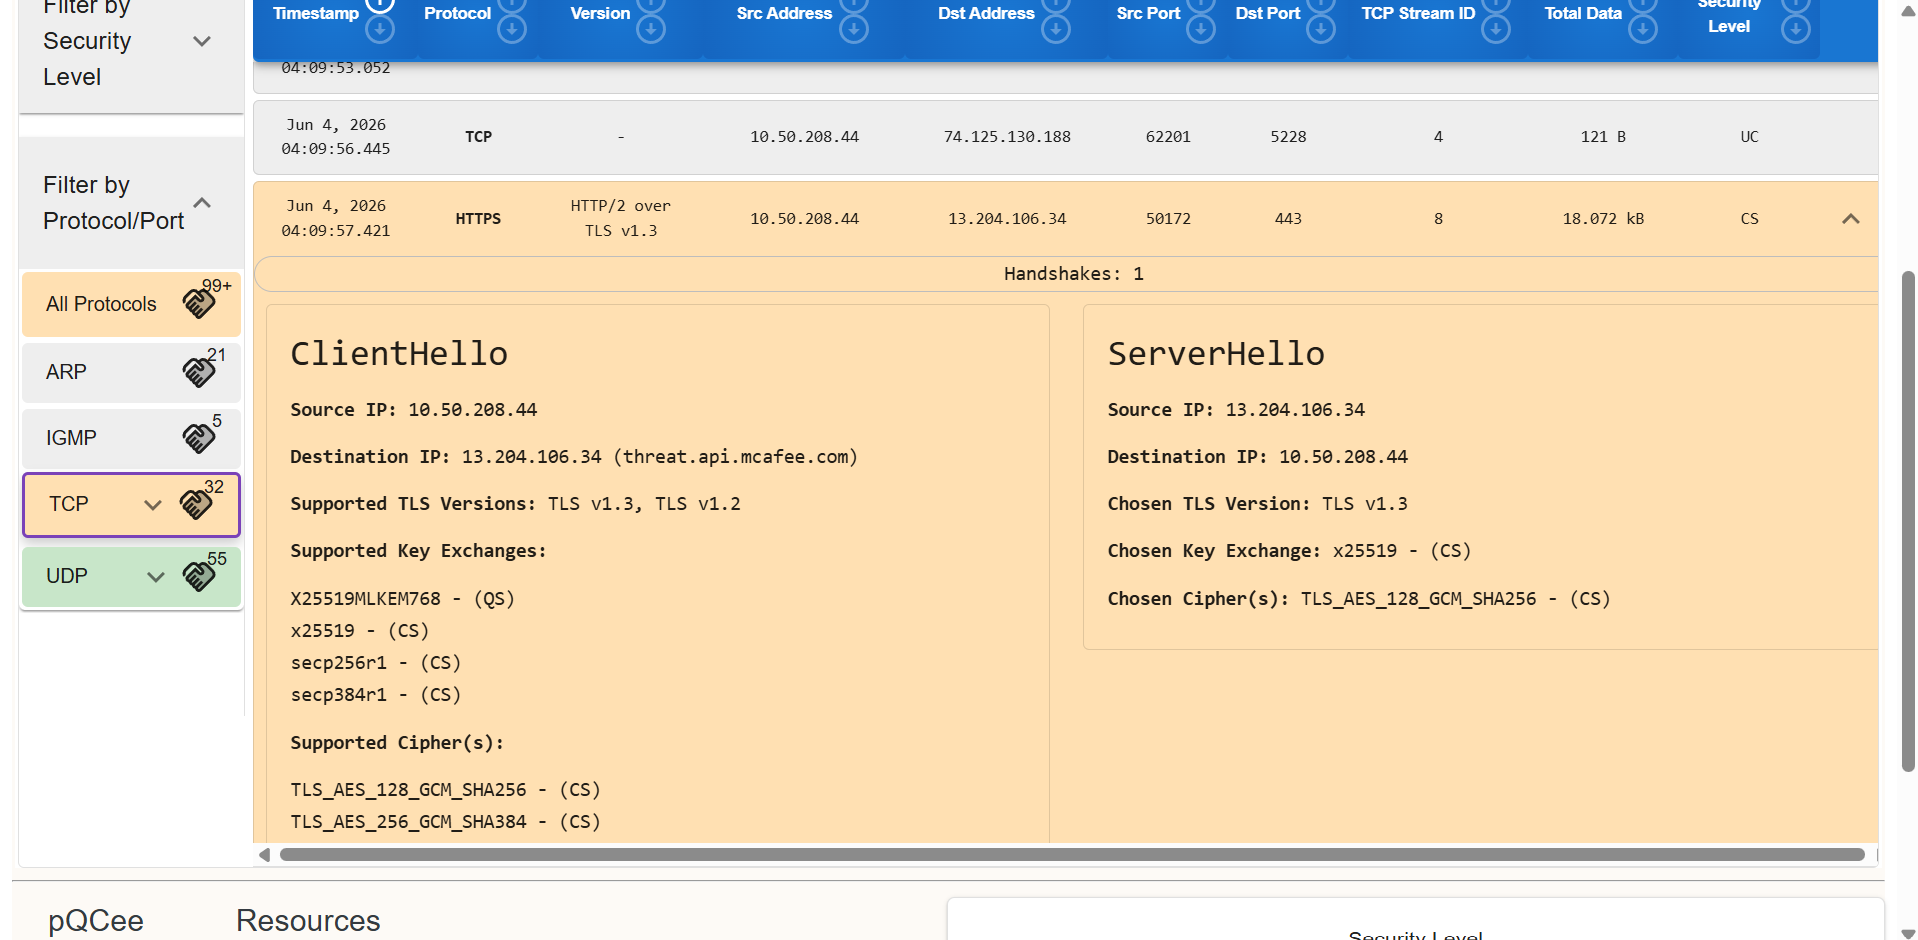
Detailed information about cryptographic protocols
Detailed information about cryptographic protocol used for each connection can be viewed to support further investigation.
Steps
Click on the dropdown arrow to the right of a connection.
The information displayed is specific to each protocol and protocol version, for example:
IPsec IKEv1
|
IPsec IKEv2
|
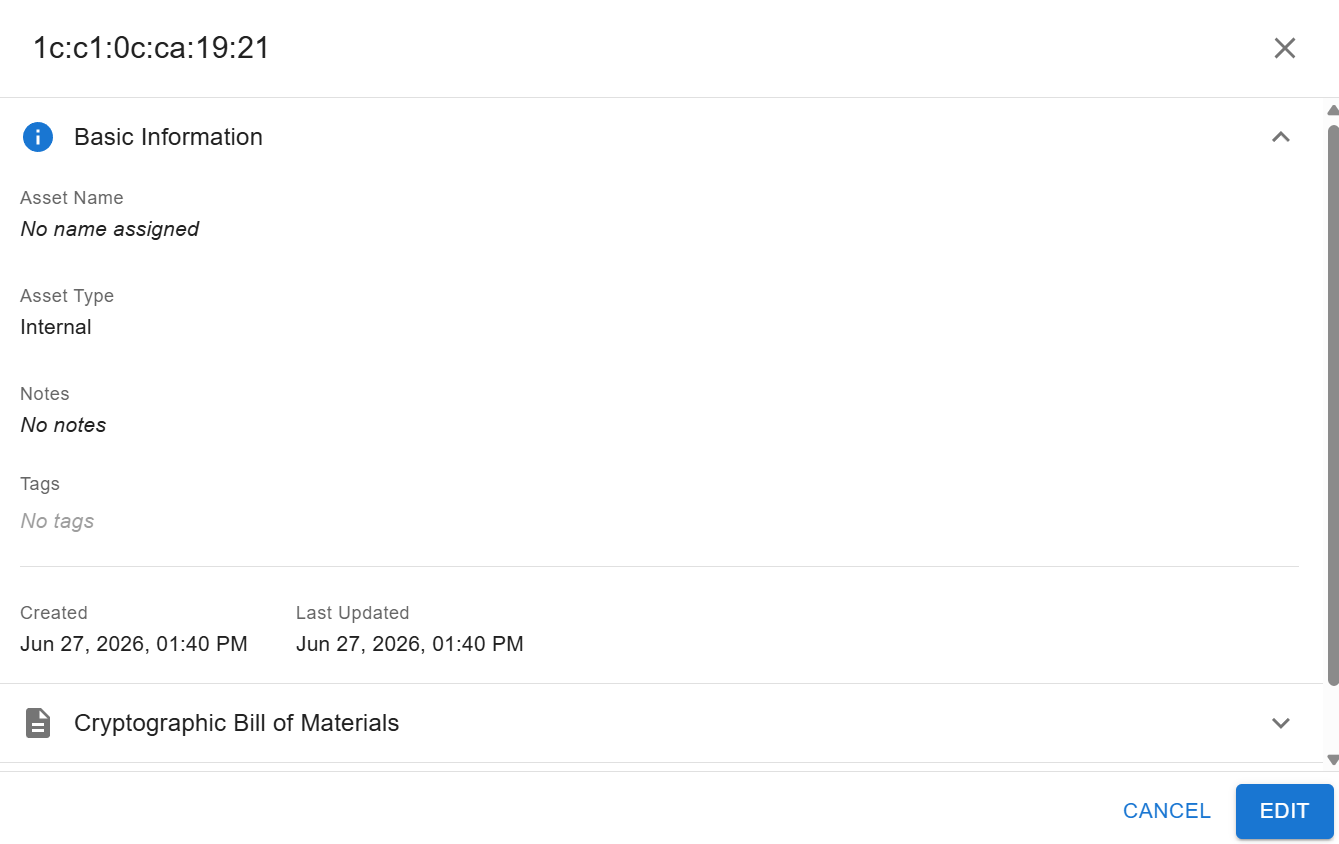
Asset management
Users can view and manage assets corresponding to a connection.
Steps
Click on any source of destination address of a connection.
Asset management features
View/Set asset name
View/Set asset type: internal or external
View/Set custom notes
Assign user-defined tags
View creation and last modified dates
Upload CBOMs
View/Set addresses: Provides a detailed list of IP addresses, connection peers, along with their associated security level classifications
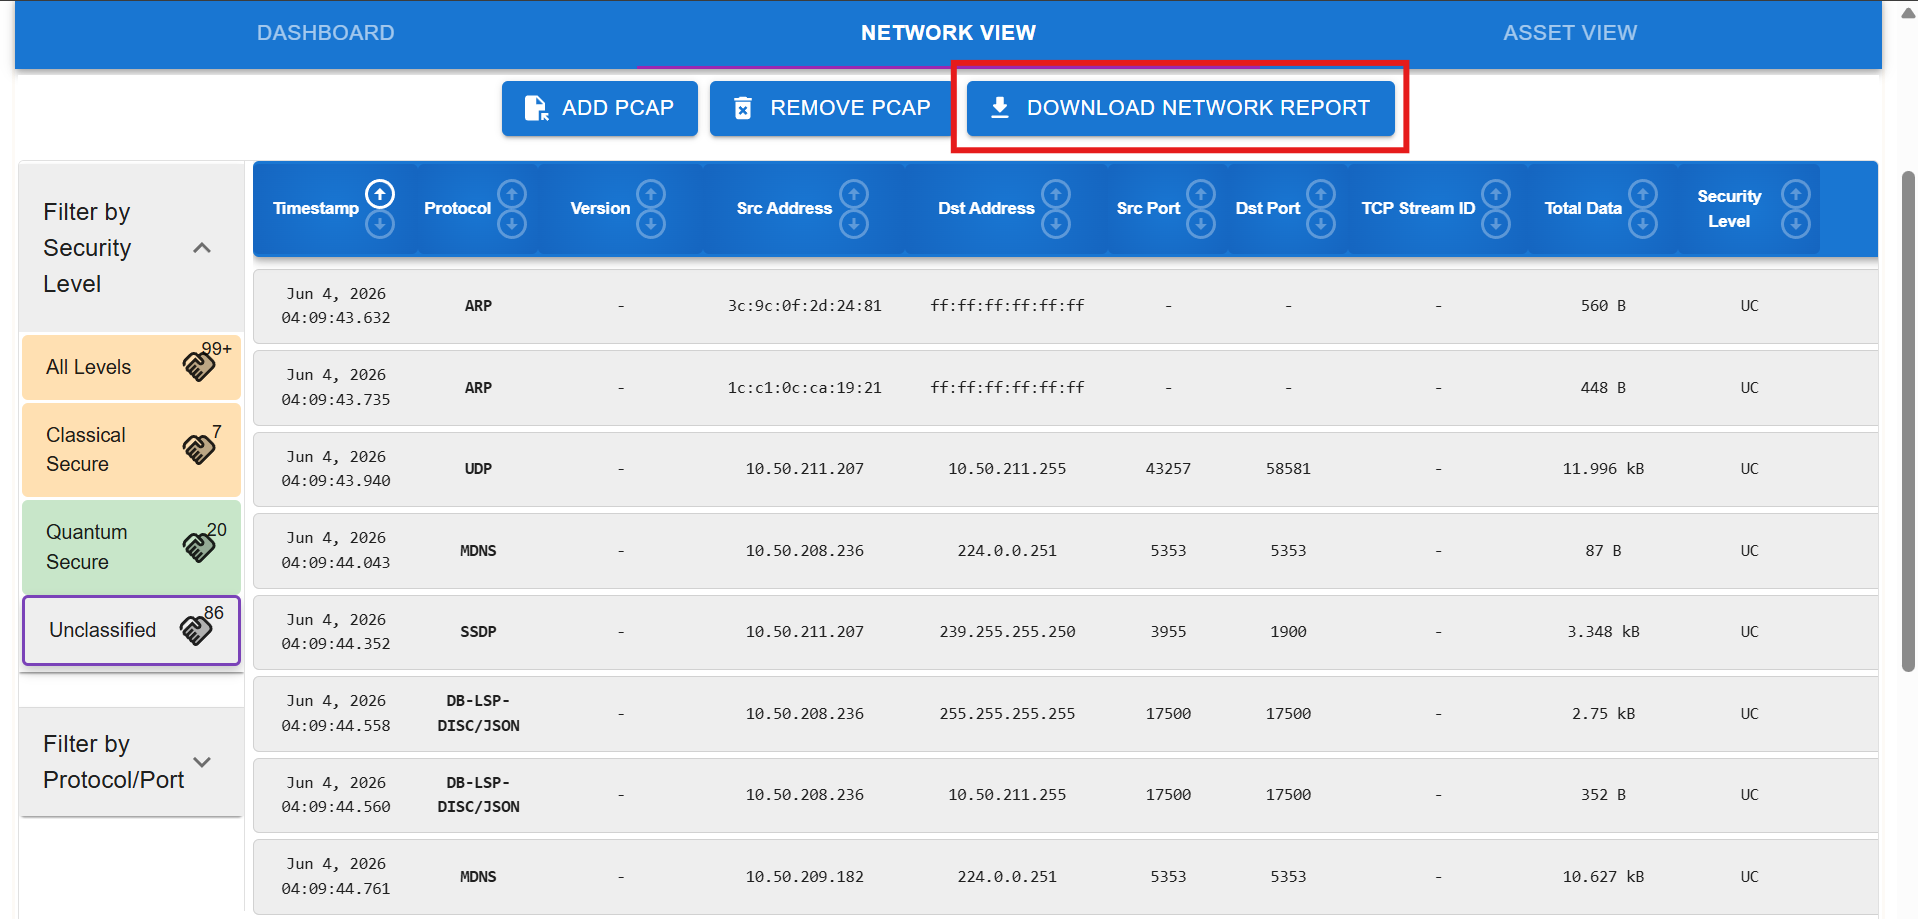
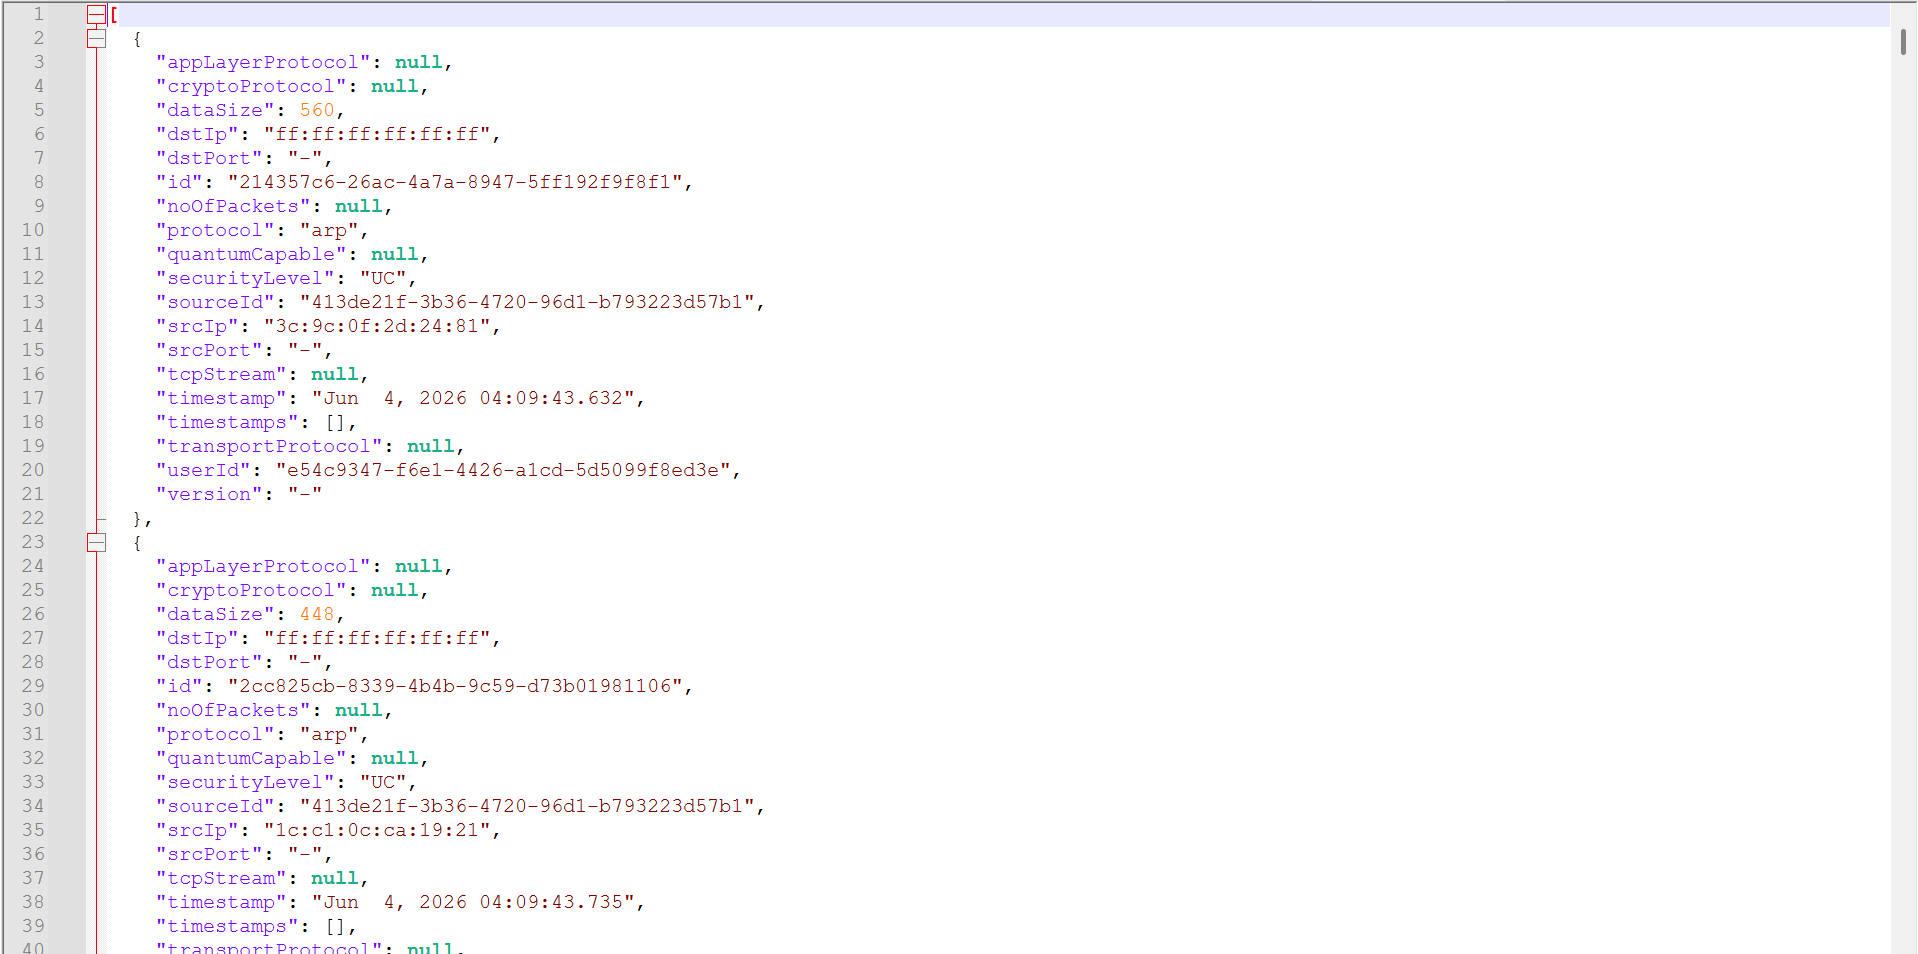
Download Network Report
Users can download the analyzed network information as a JSON file for further analysis or record-keeping.
Steps
Click on the
DOWNLOAD NETWORK REPORTbutton to begin download.
Asset View
Once a network report has been generated, the Asset View provides a detailed list of all assets associated with connections discovered.
The main view
This view organizes assets into two primary categories.
Internal: Assets located within the organization’s managed network environment.
External: Assets outside of the organization’s managed network environment.
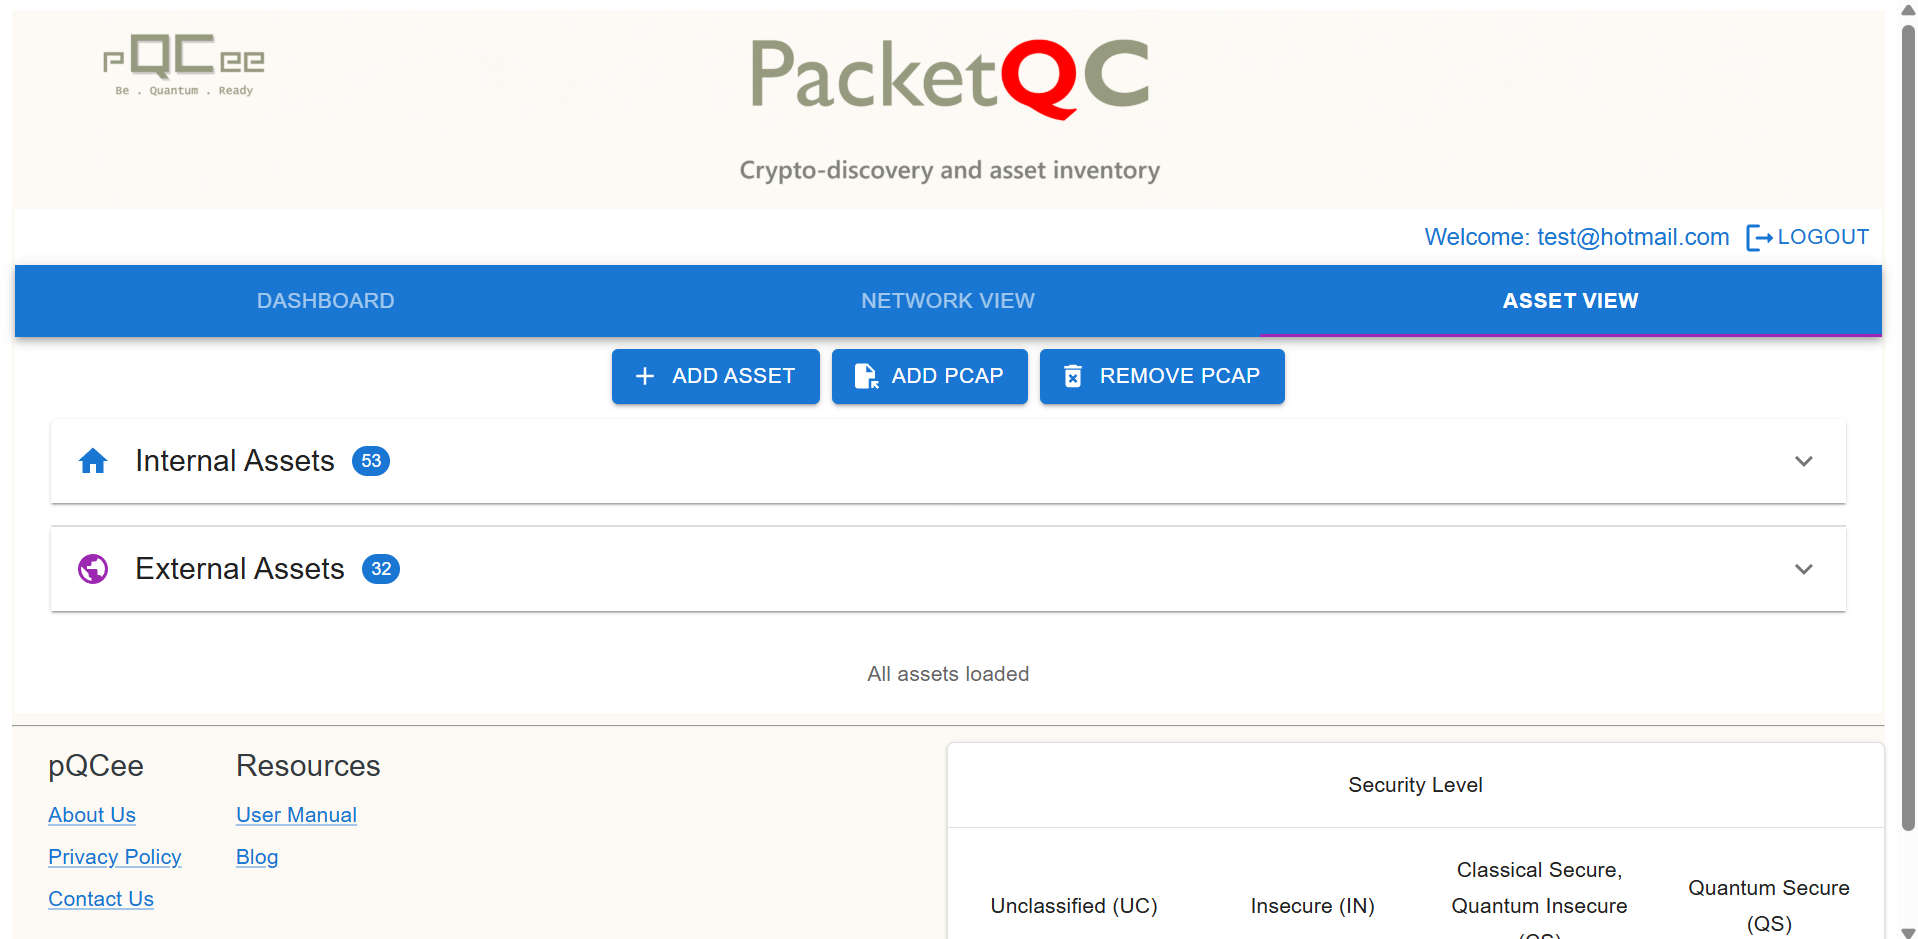
Fig. 16 Asset View
Expand either category to view its list of assets.
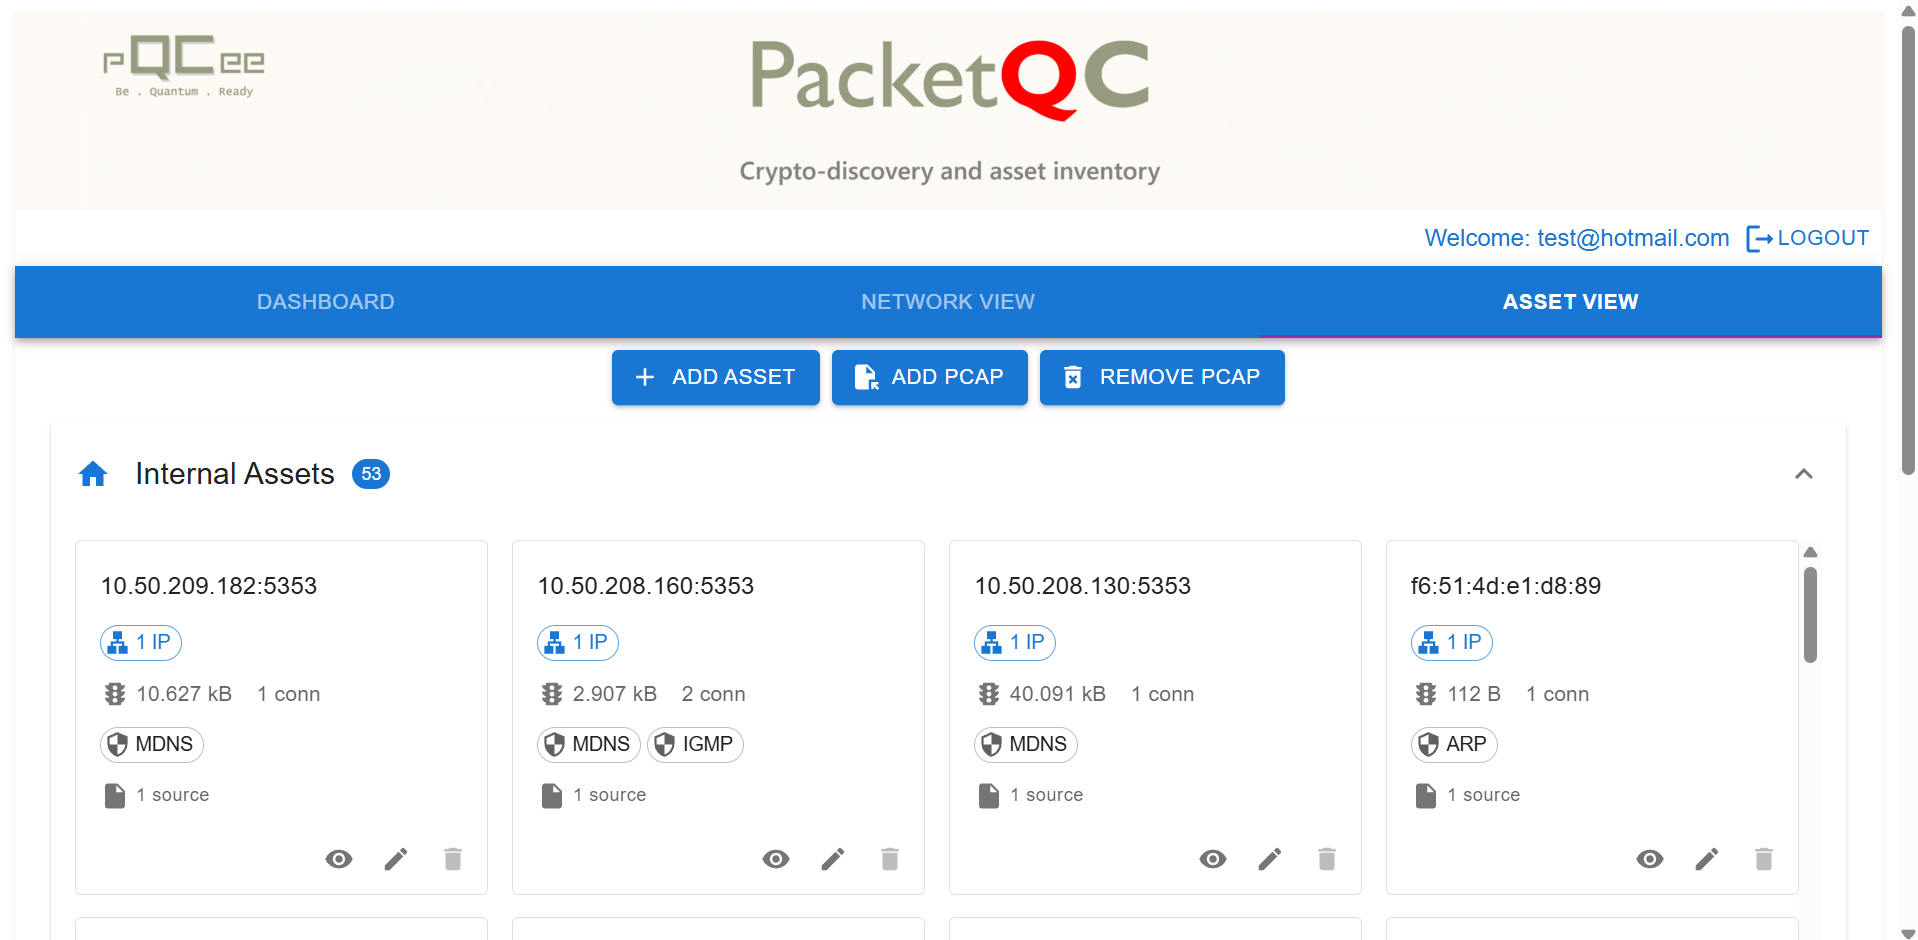
Fig. 17 Internal assets in Asset View
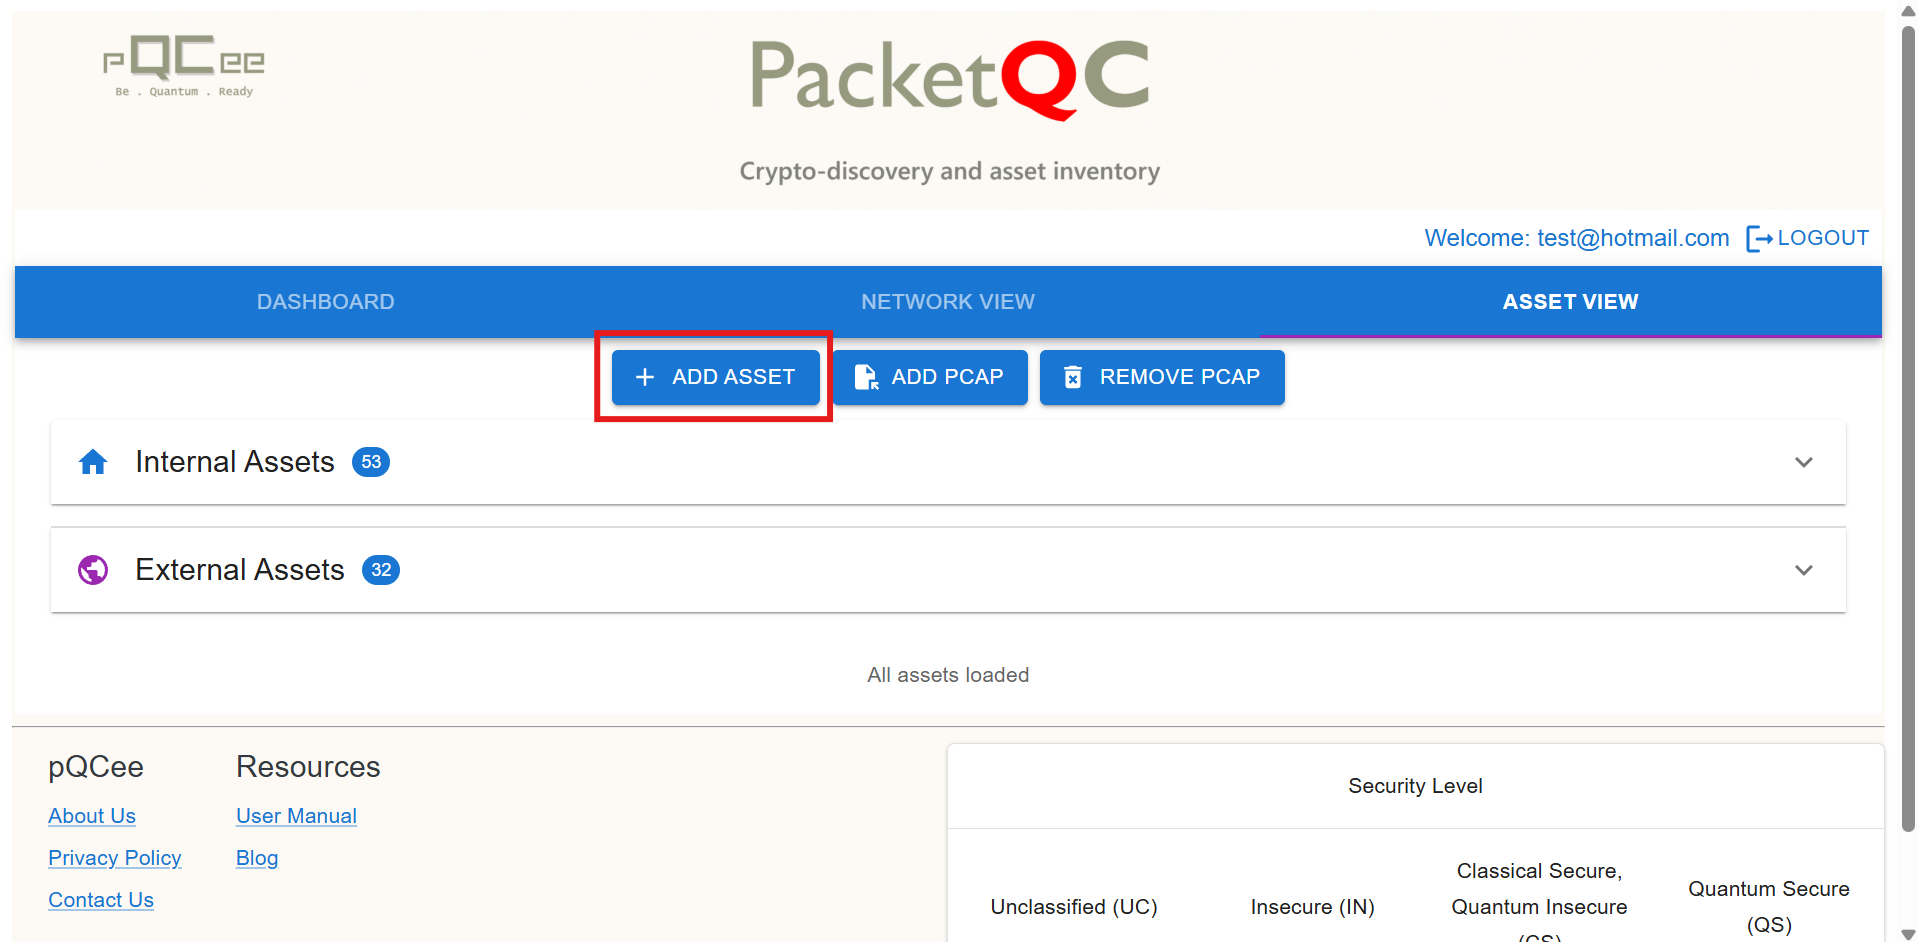
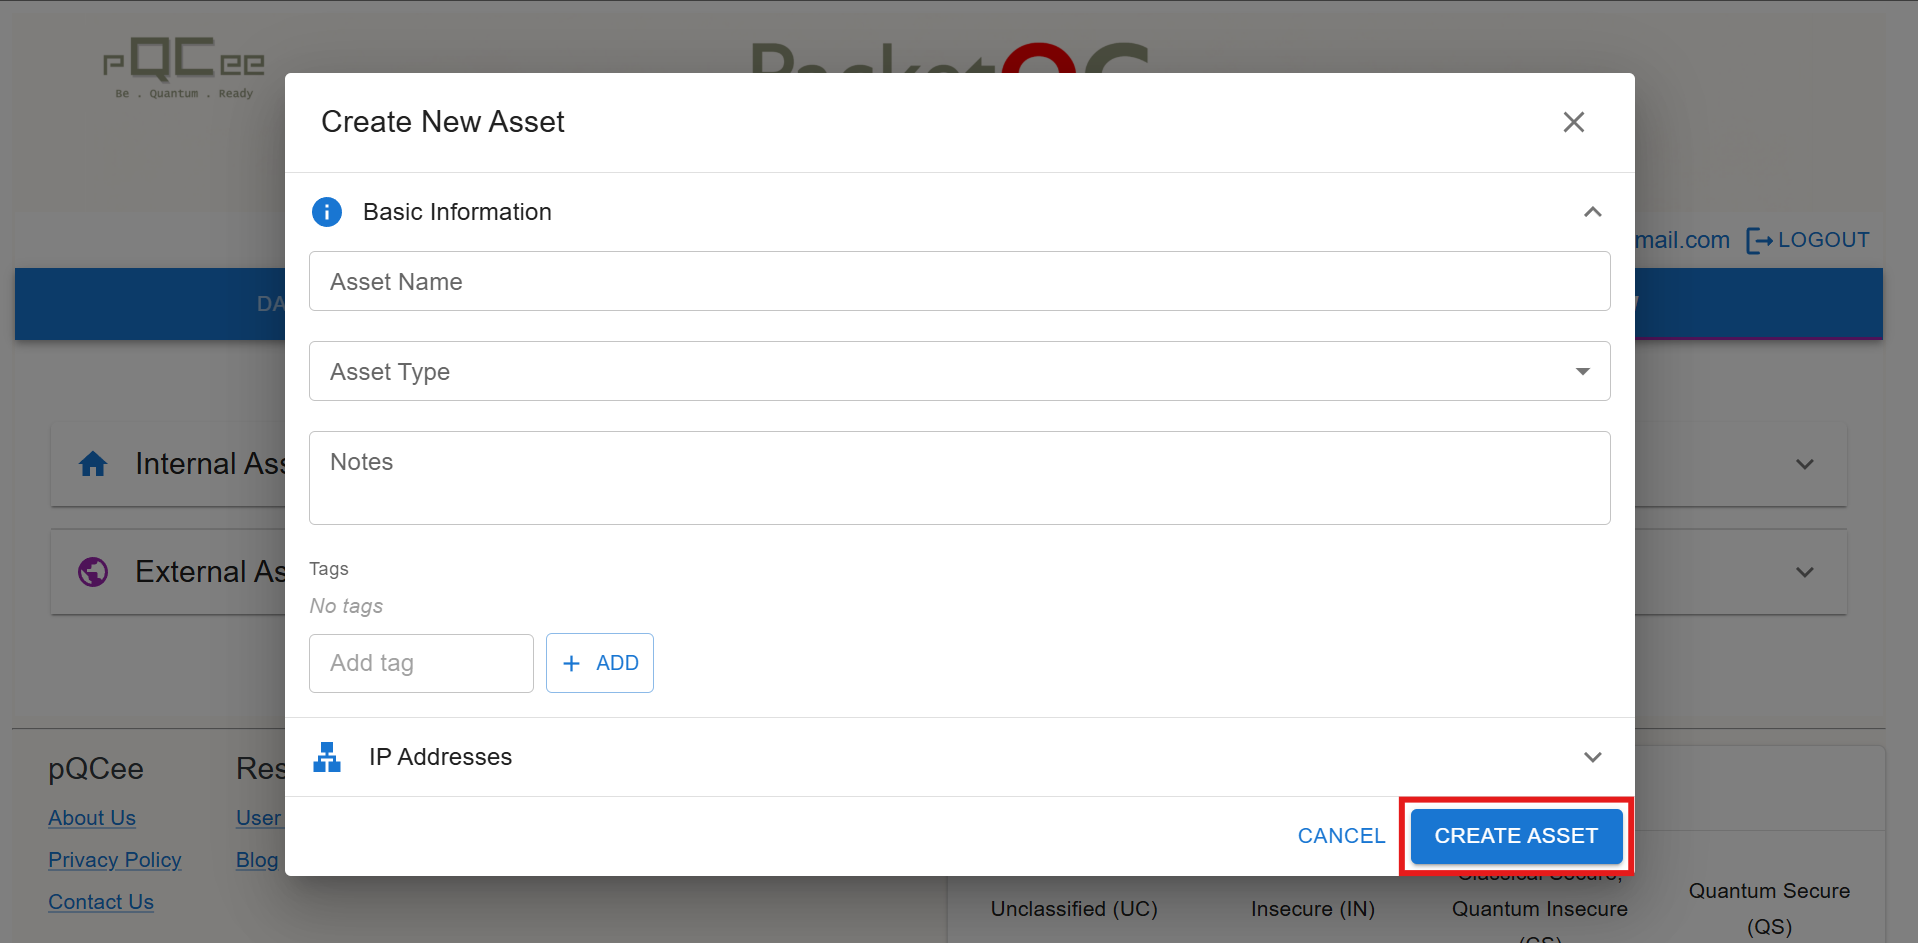
Manually add assets
Assets are typically generated from pcap analysis. Users can also manually add an asset:
Steps
Click the
ADD ASSETbutton to add a new asset.Complete the form and click
CREATE ASSET.
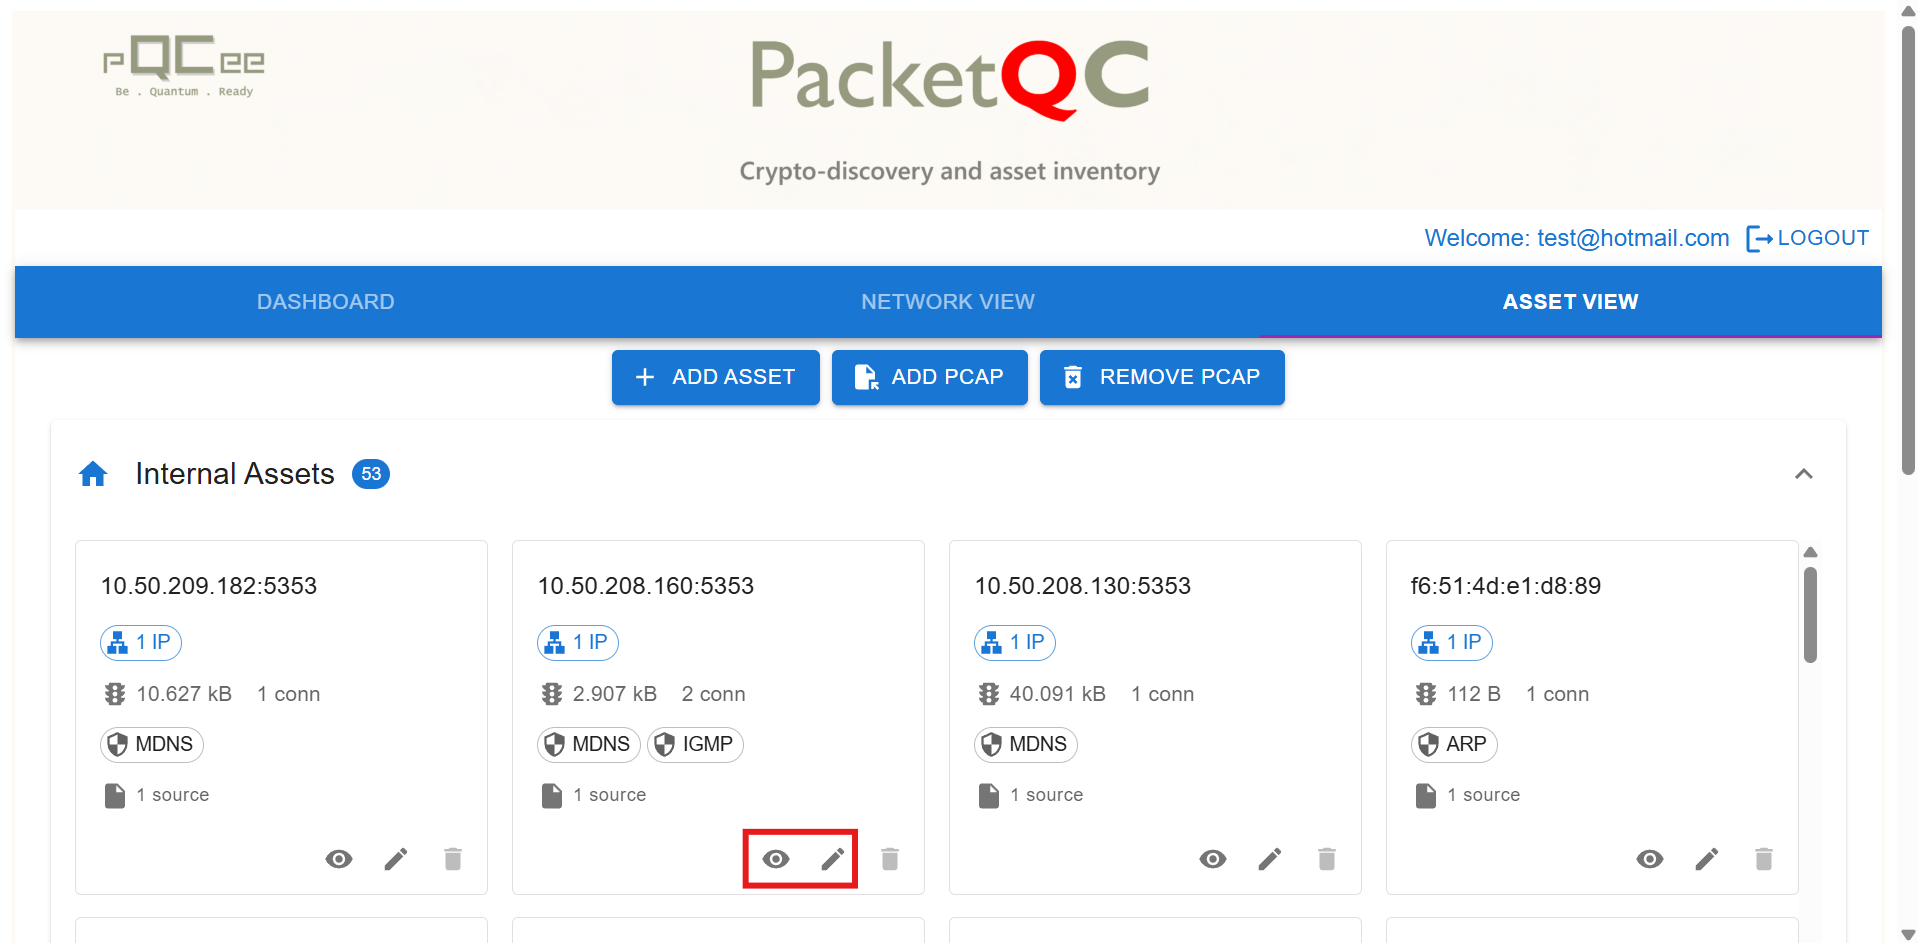
Asset management
Users can view and manage assets.
Steps
Find an asset in either internal or external view.
Click on the eye icon to view asset, or pen icon to edit asset.
Asset management features
View/Set asset name
View/Set asset type: Internal or external
View/Set custom notes
Assign user-defined tags
View creation and last modified dates
Upload CBOMs
View/Set addresses: Provides a detailed list of IP addresses, connection peers, along with their associated security level classifications
CBOM management
Users can maintain Cryptographic Bills of Materials for individual assets, helping them track cryptographic components and support post-quantum migration planning.
Steps
Find an asset in either internal or external view.
Click on the eye icon to view asset.
Under
Cryptographic Bill of Materials, select anEffective Date.Click
CLICK TO UPLOAD CBOMand select a CBOM.Once everything is done, click
SUBMIT.
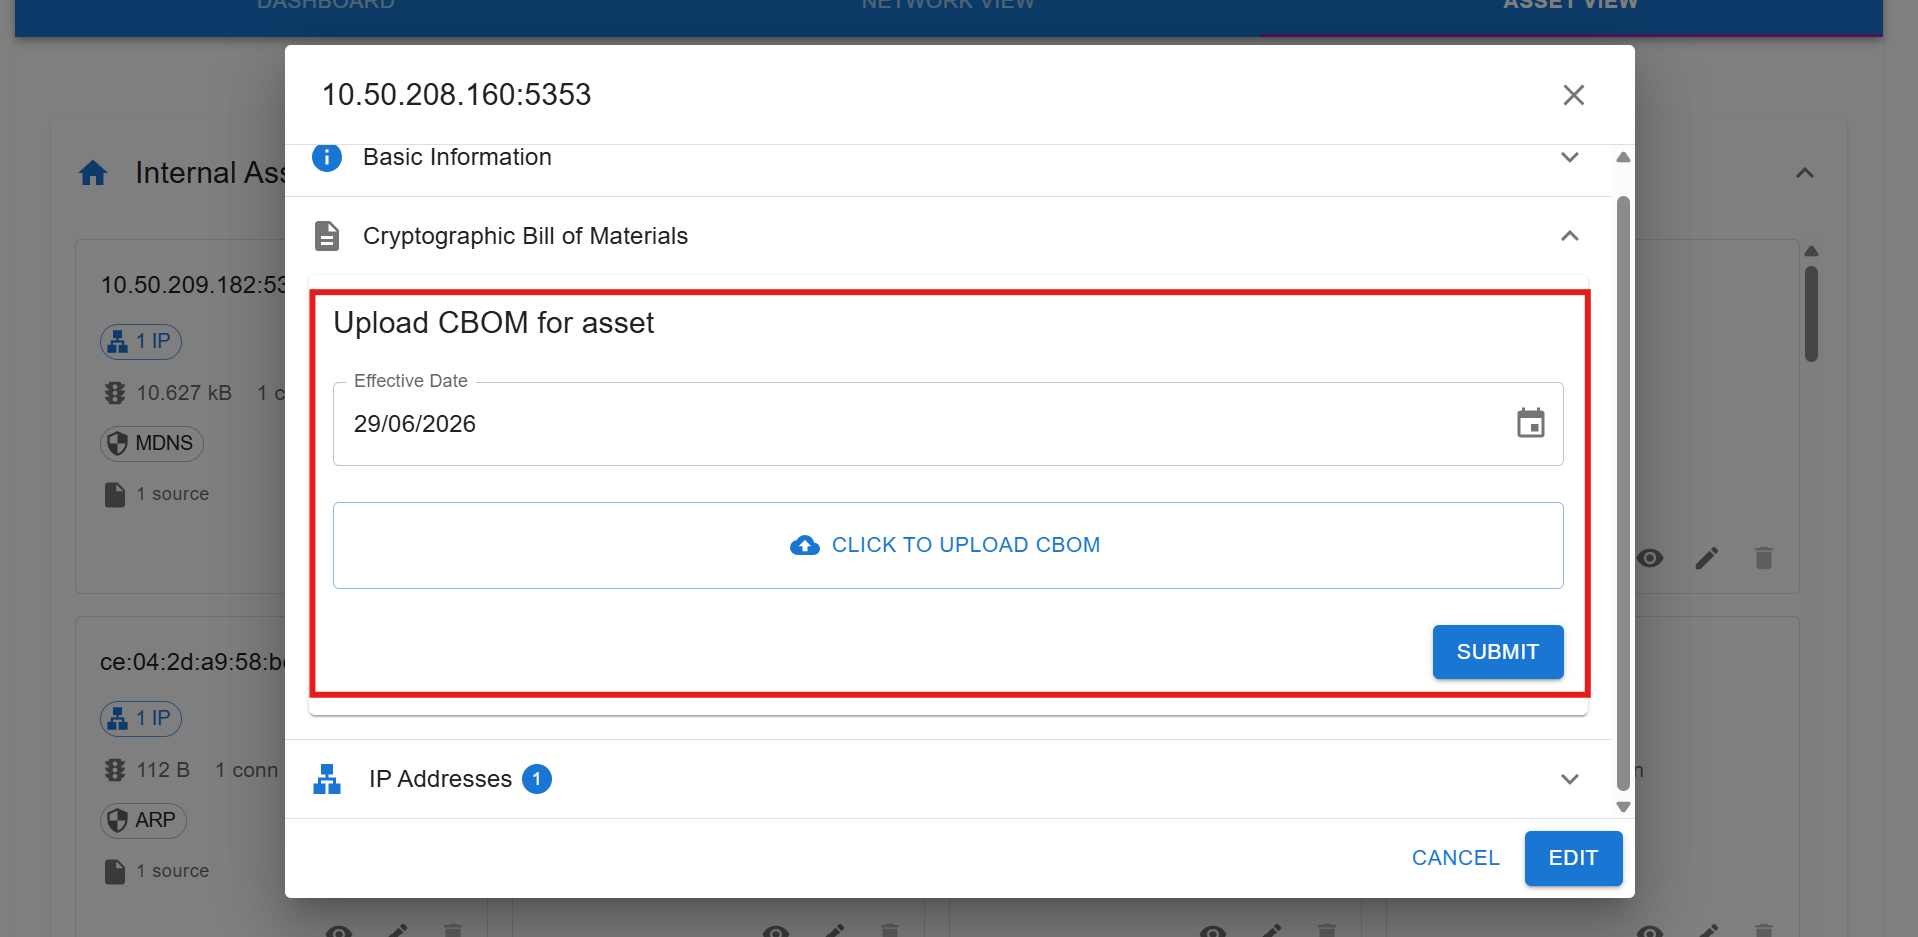
Fig. 22 Interface to upload CBOM
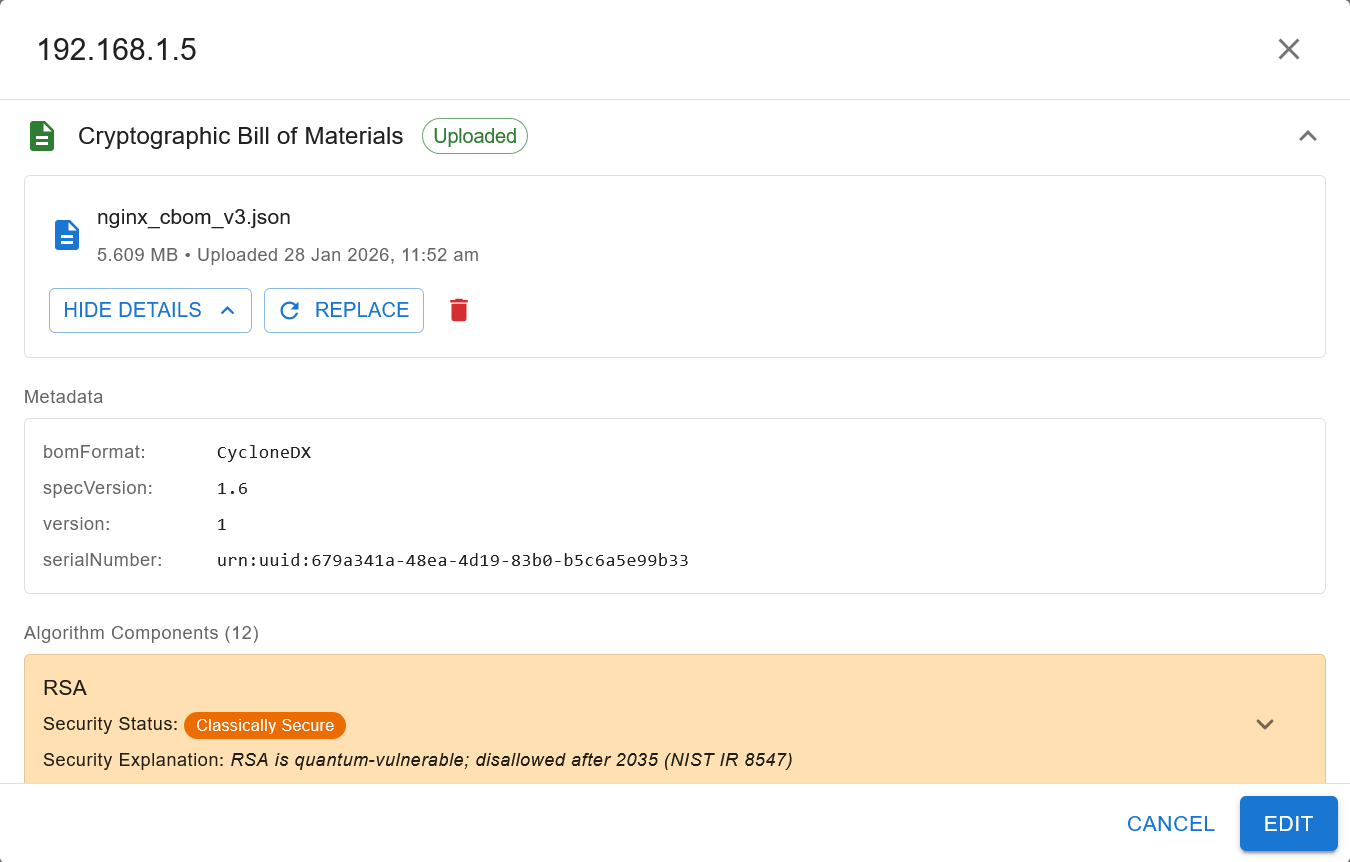
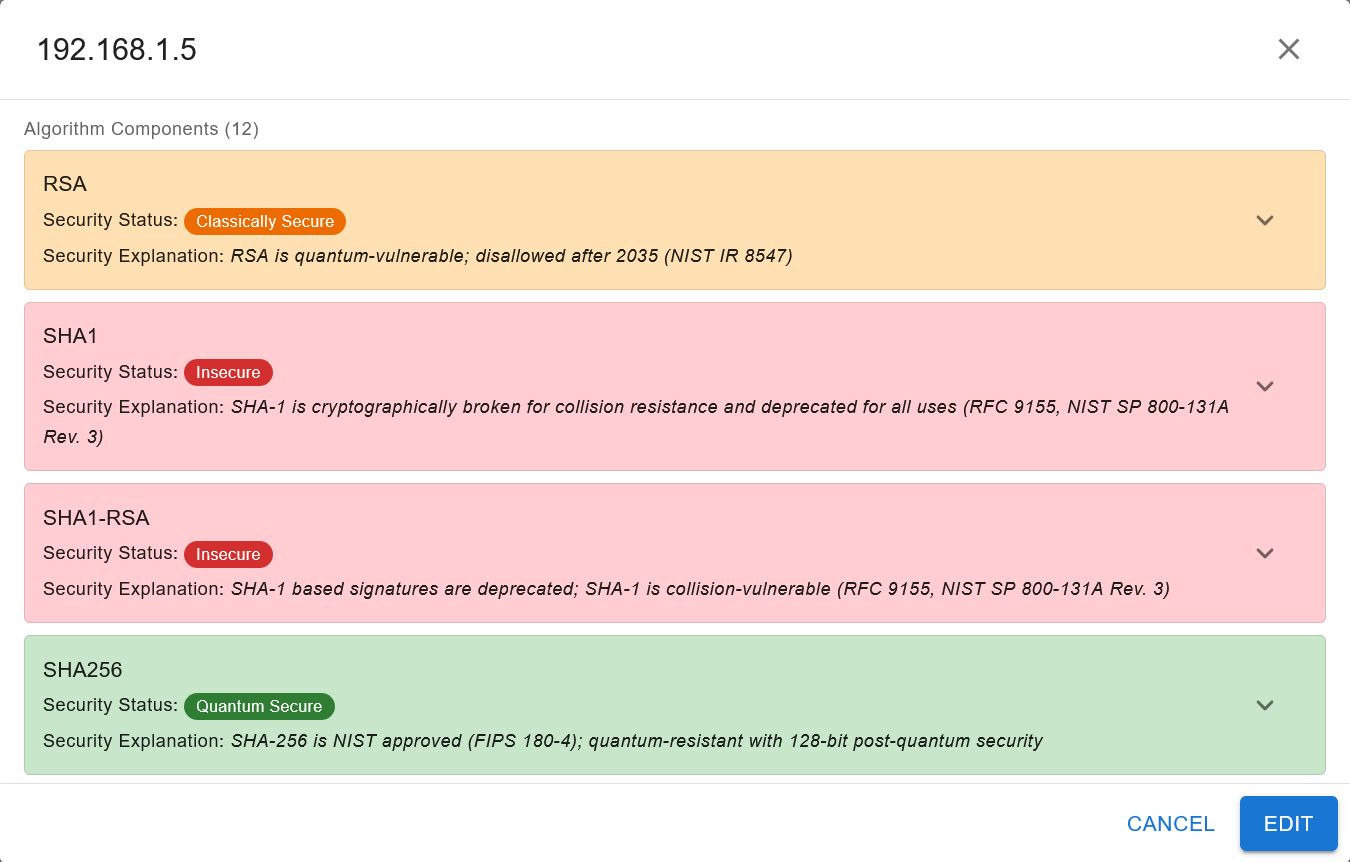
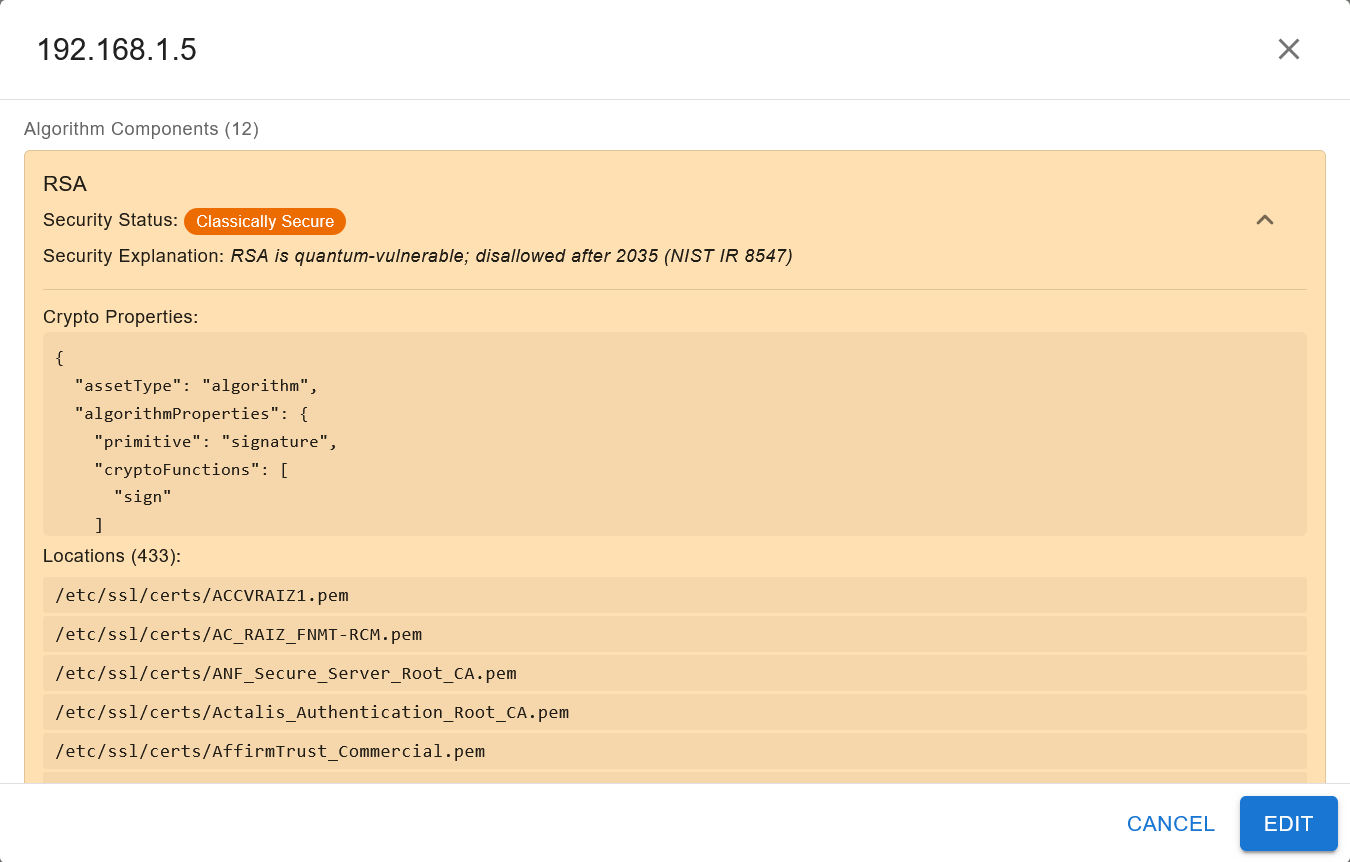
Once uploaded, a CBOM analysis is presented with the following information:
Metadata: CBOM format, version, and serial number.
Algorithm Components: A summary of detected cryptographic algorithms and their associated security level classifications.
Crypto Properties: Displays the type of cryptographic function (eg. used for Signatures).
Locations: Assets or components where this cryptographic algorithm is detected (eg. files within the filesystem).
The following screenshots illustrate sample views of an uploaded CBOM.
2. Capturing network traffic in pcap/pcapng
Here are some ways to capture network traffic.
Wireshark: Capture network traffic in pcap format
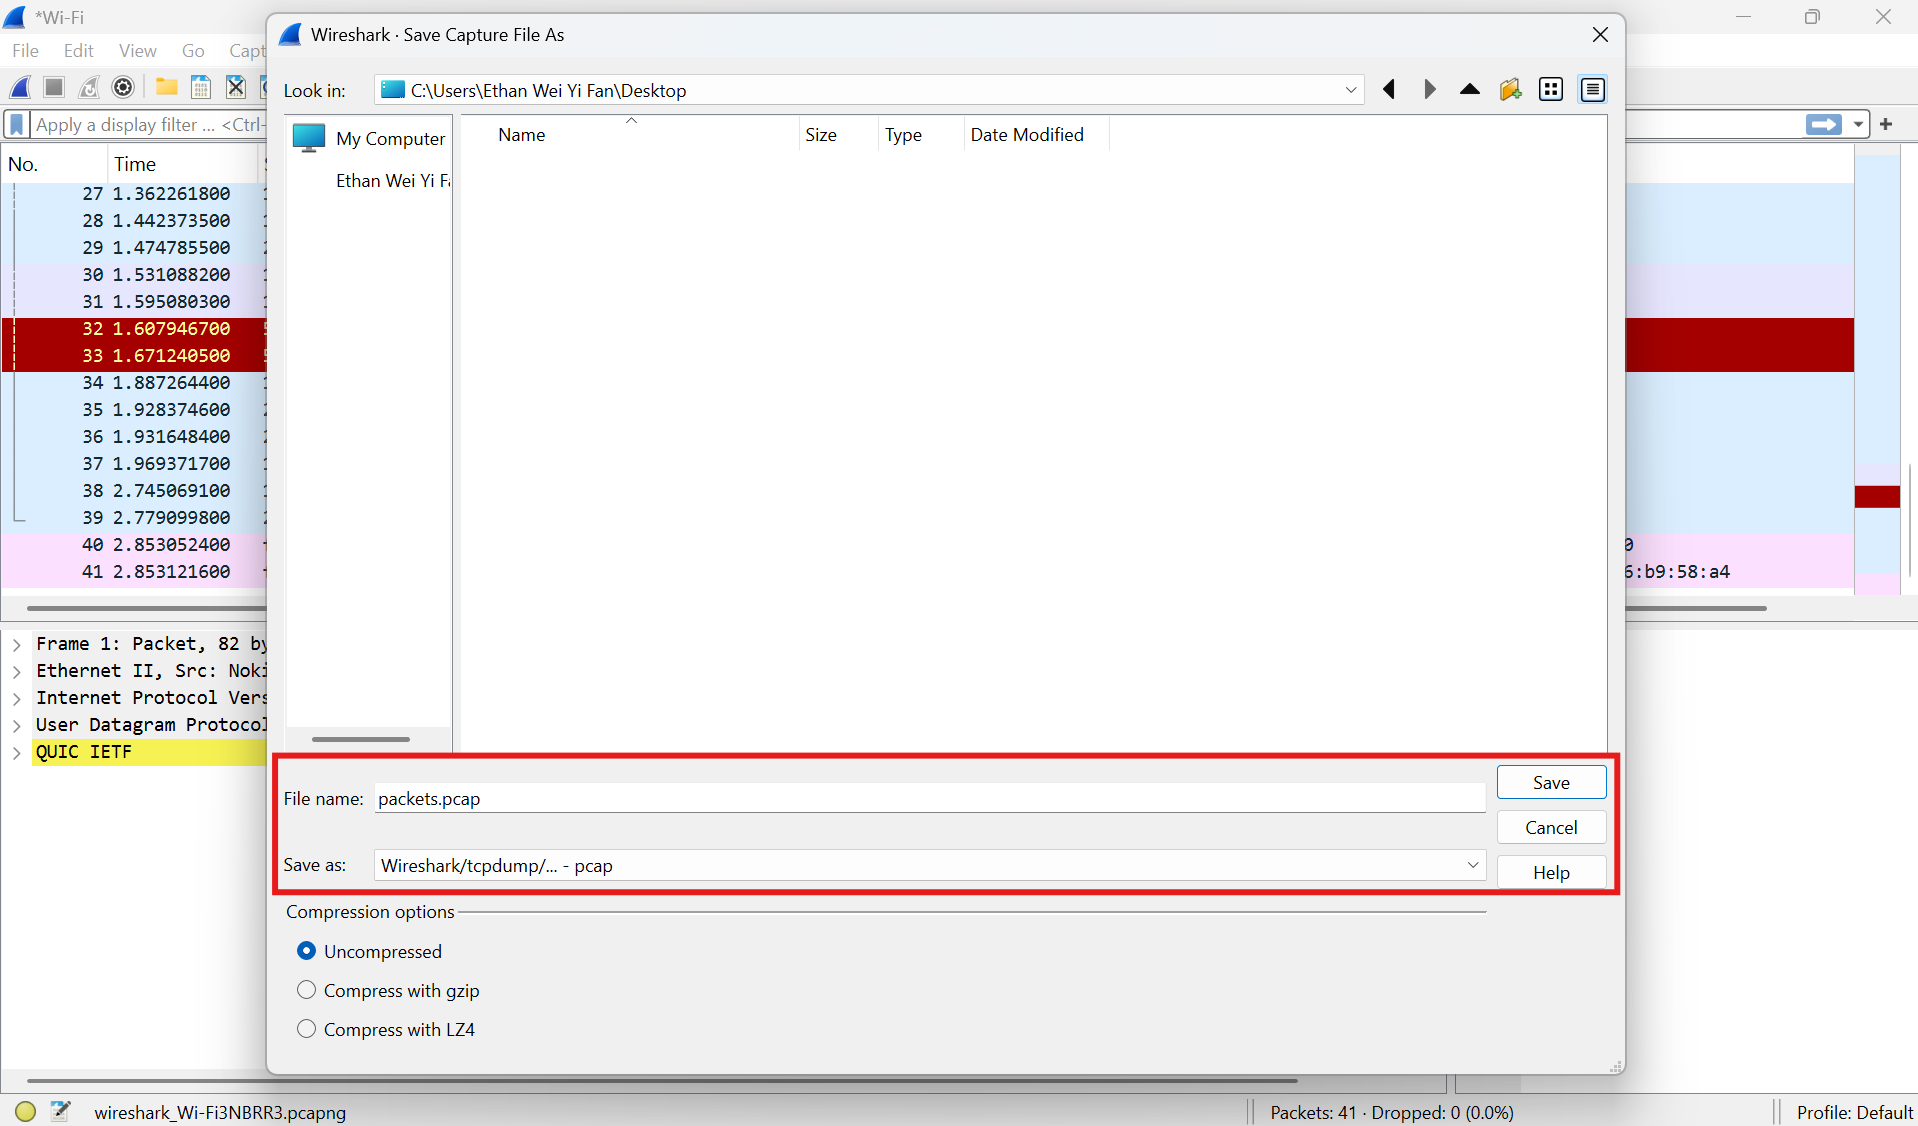
Wireshark provides a convenient way to capture network traffic and export it in PCAP format for further analysis.
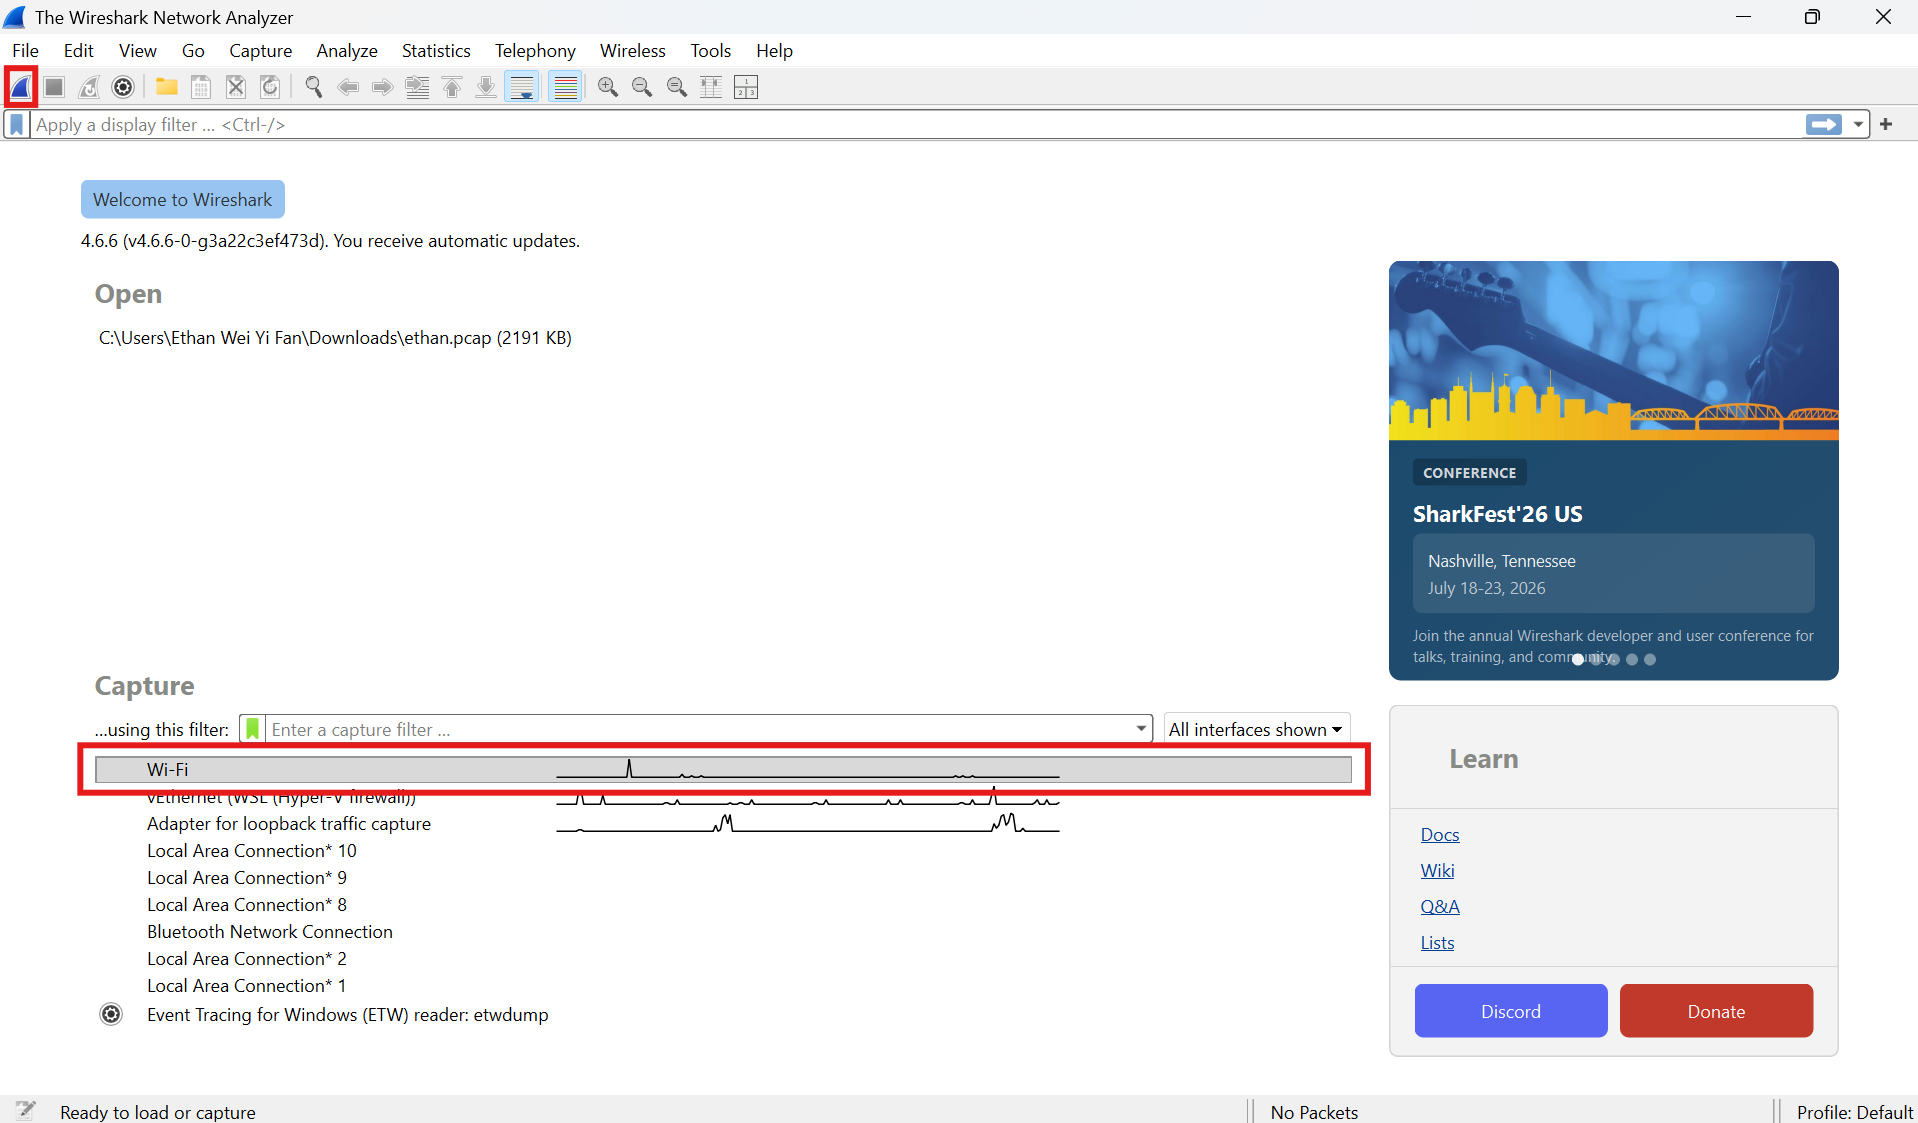
Steps
Identify the network interface card (NIC) on which network traffic will be captured. Select it and click the fin icon on the top left to start packet capture.
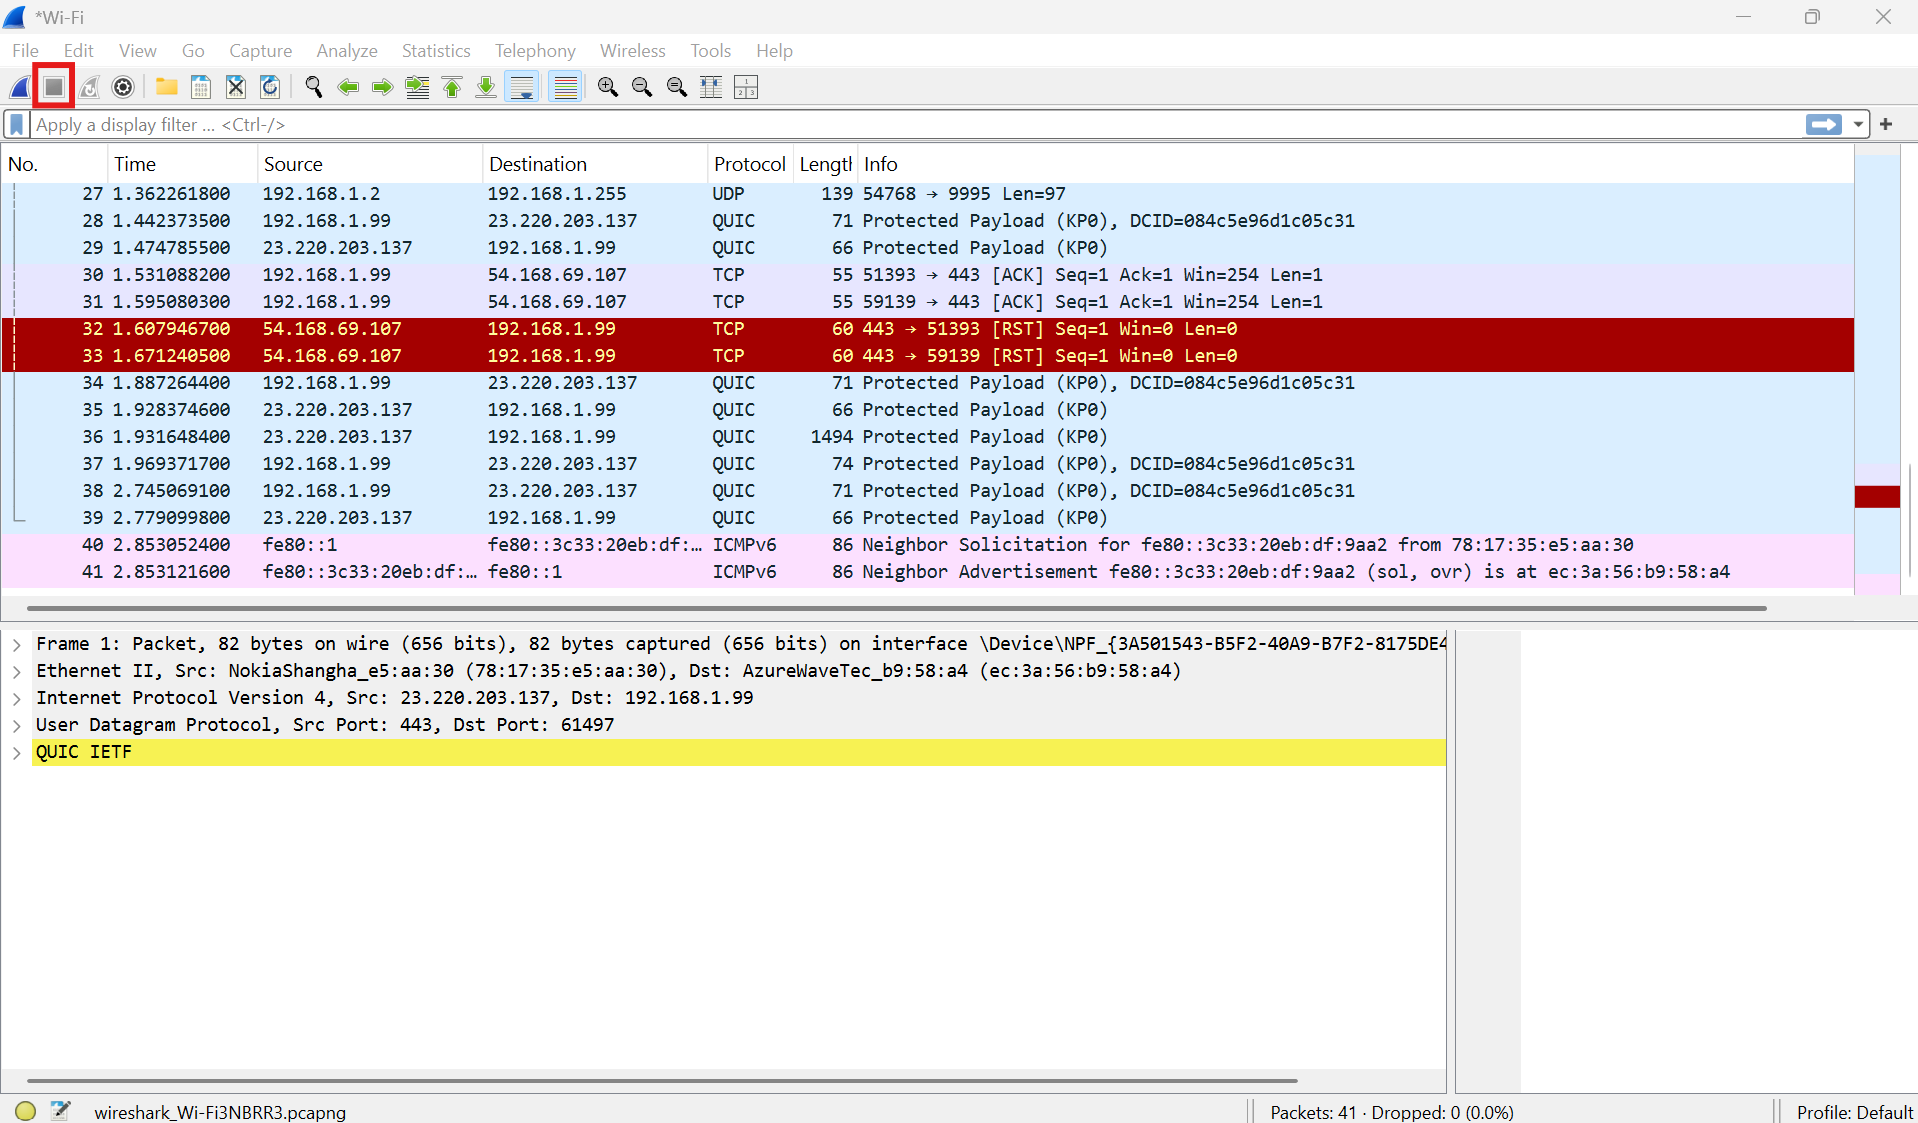
Wait until a sufficient number of packets has been captured. Click the red square icon on the top left to stop packet capture.
Select
Save as: Wireshark/tcpdump/... - pcap, enter a file name, and clickSave.
Wireshark: Capture network traffic in pcapng format
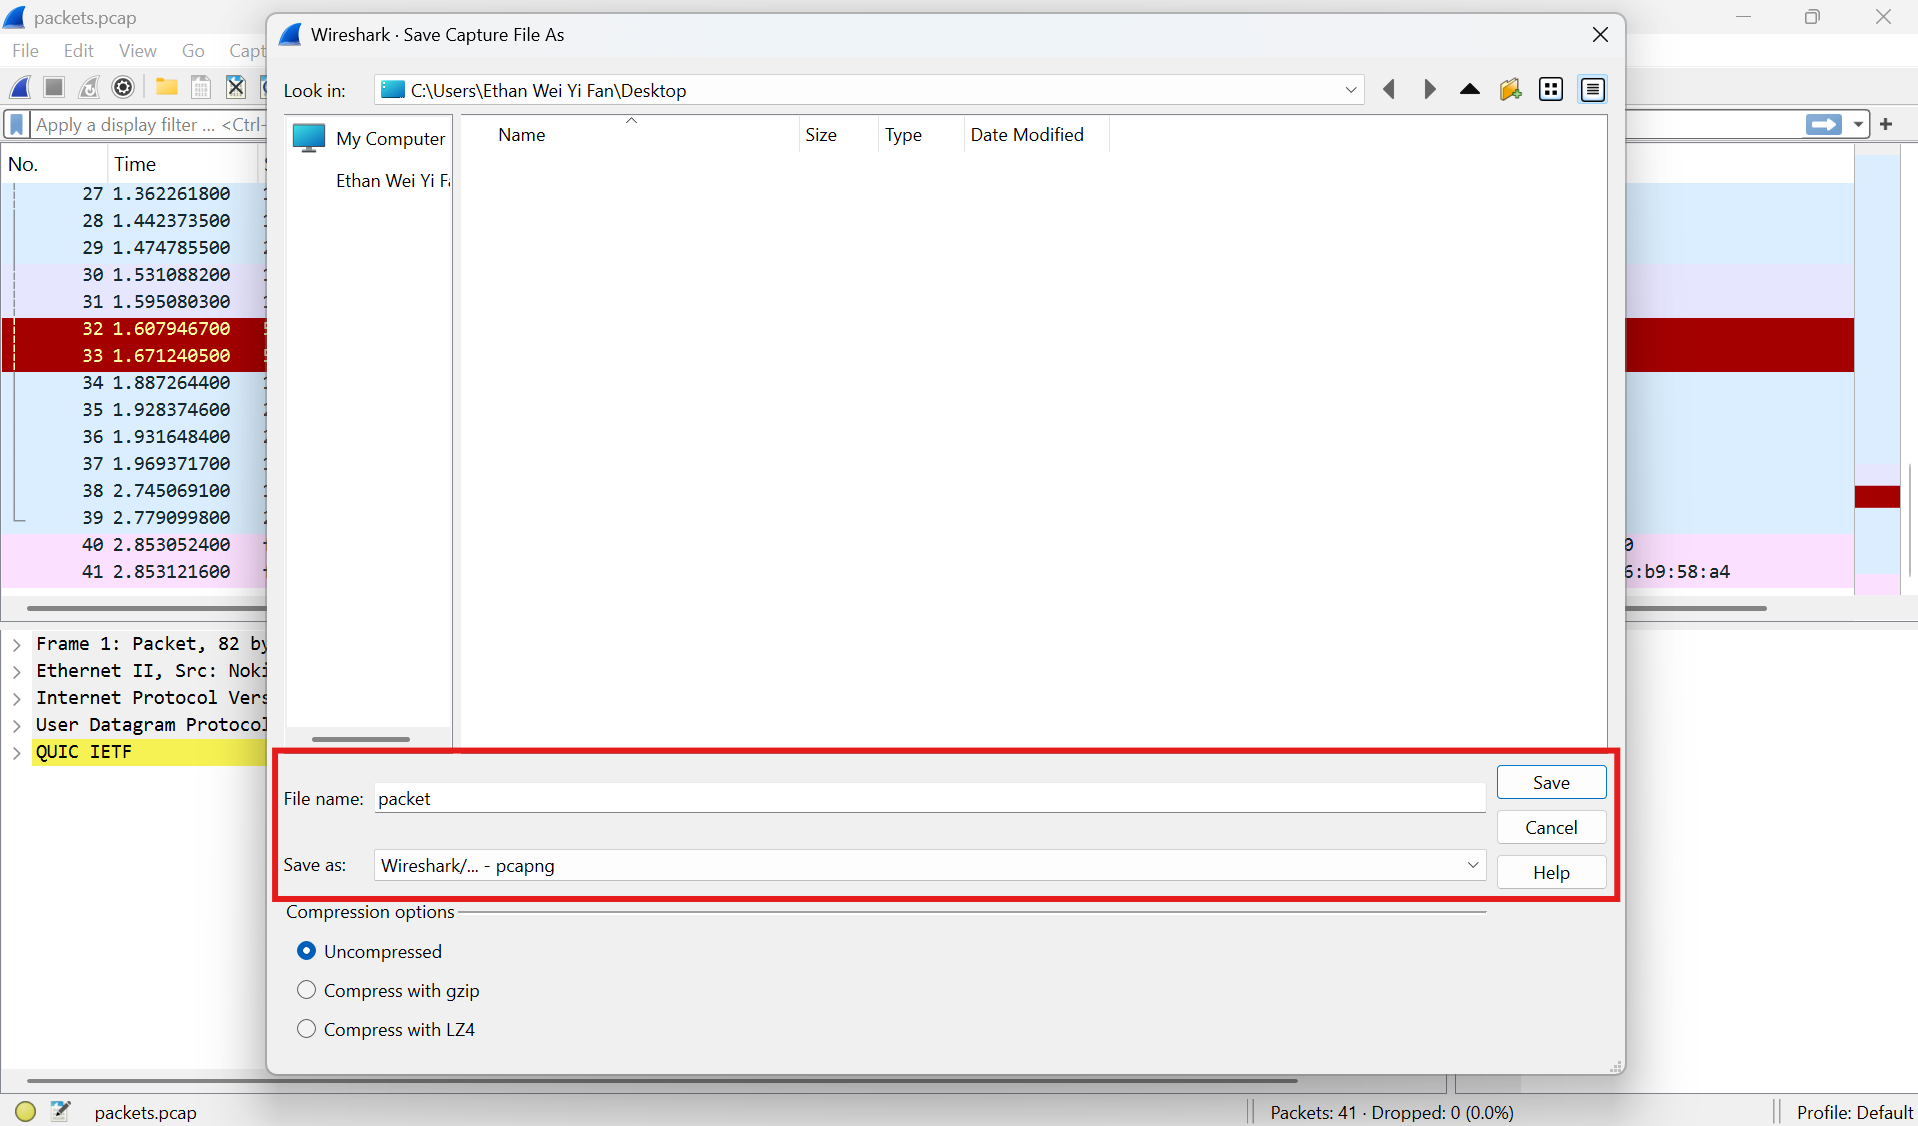
Wireshark provides a convenient way to capture network traffic and export it in PCAPNG format for further analysis.
Steps
Identify the network interface card (NIC) on which network traffic will be captured. Select it and click the fin icon on the top left to start packet capture.
Wait until a sufficient number of packets has been captured. Click the red square icon on the top left to stop packet capture.
Select
Save as: Wireshark/... - pcapng, enter a file name, and clickSave.
tcpdump: Capture network traffic in pcap format
tcpdump is a CLI tool useful for capturing network traffic on headless Linux devices, such as Ubuntu Server environments, and can also be used in shell scripts for automated packet capture workflows.
Steps
Run the following command to identify the network interface card (NIC) on which network traffic will be captured.
ip addrRun the following command to begin a basic packet capture. Replace
your_nicwith the NIC from which traffic is captured. For additional packet capture configuration options, refer to the official tcpdump manual.sudo tcpdump -i your_nic -s 0 -w packets.pcapWait until a sufficient number of packets has been captured. Press
Ctrl + Cto end network traffic capture.
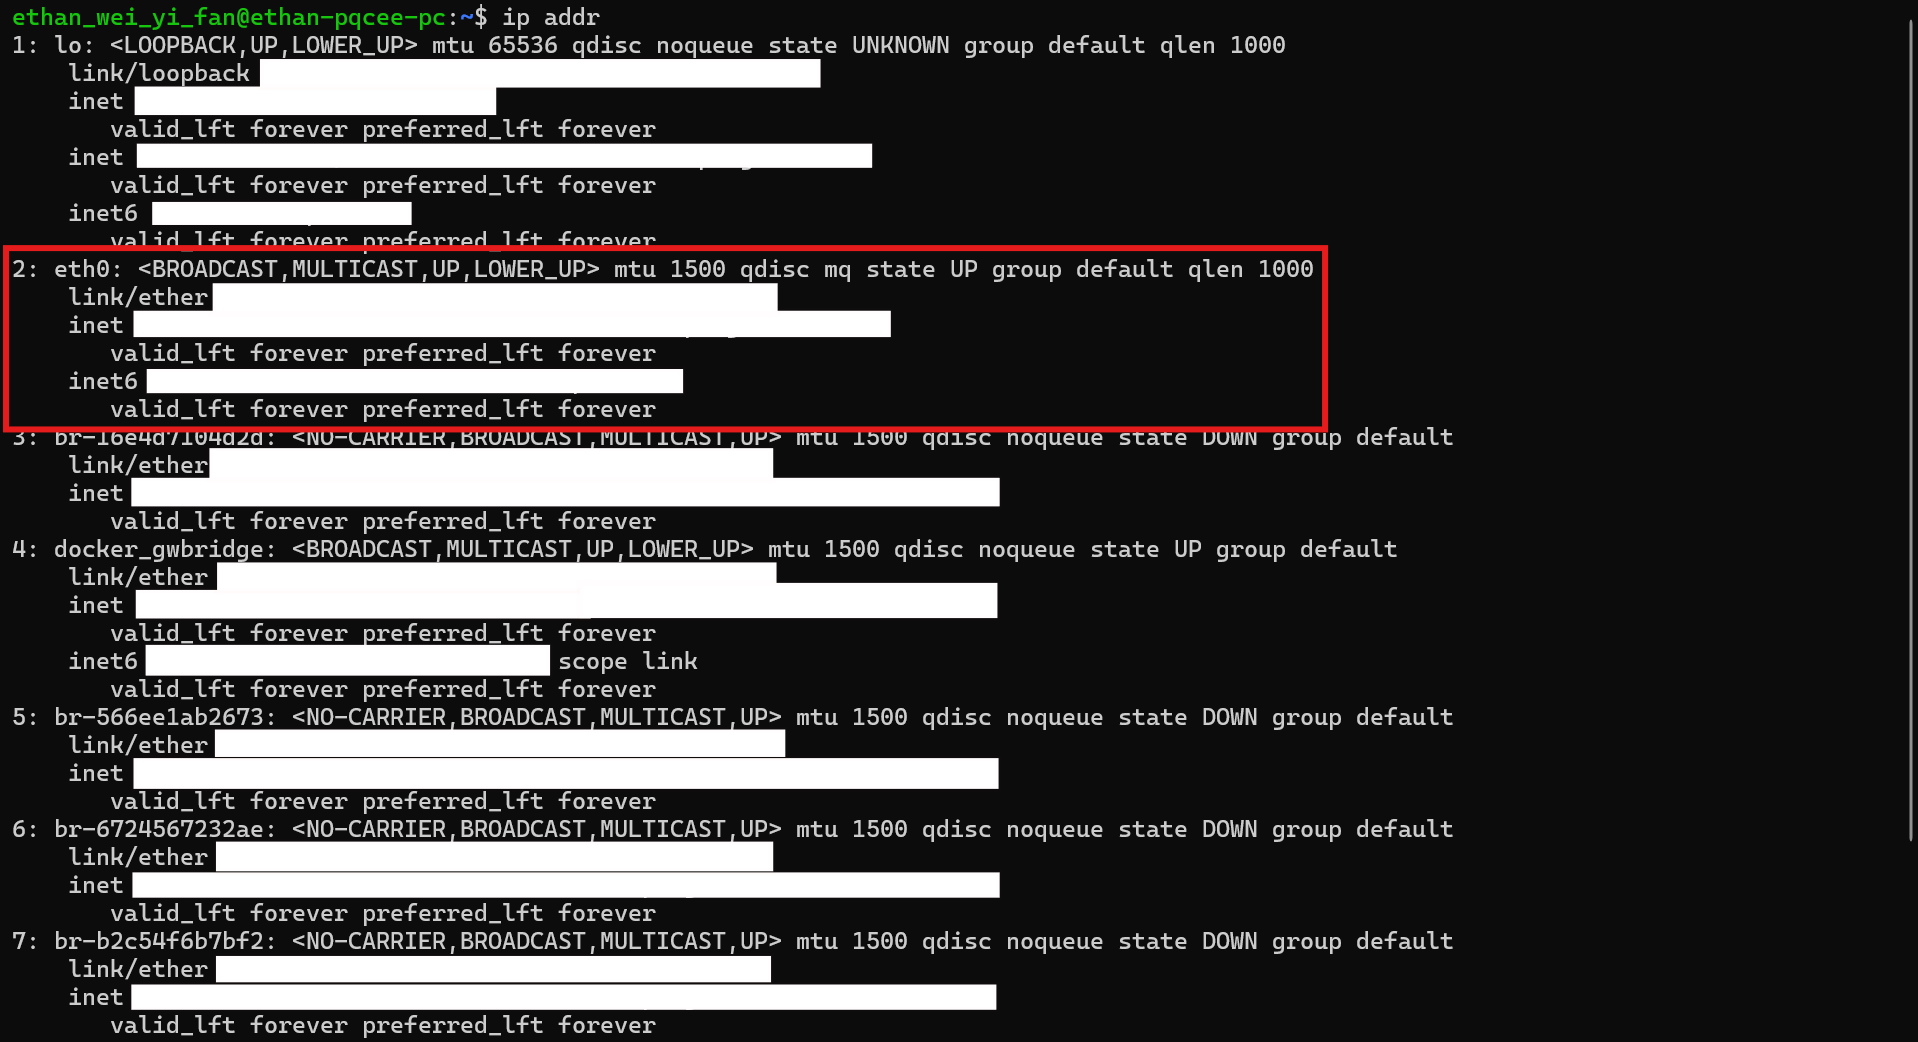
Fig. 32 Finding your NIC
tshark: Capture network traffic in pcapng format
tShark is a terminal oriented version of Wireshark useful for capturing network traffic on headless Linux devices, such as Ubuntu Server environments, and can also be used in shell scripts for automated packet capture workflows.
Steps
Run the following command to identify the network interface card (NIC) on which network traffic will be captured.
ip addrRun the following command to begin a basic packet capture. Replace
your_nicwith the NIC from which traffic is captured. For additional packet capture configuration options, refer to the official tshark manual.sudo tshark -i your_nic -w /tmp/packets.pcapngWait until a sufficient number of packets has been captured. Press
Ctrl + Cto end network traffic capture.
Fig. 33 Finding your NIC